-1.png?width=151&height=28&name=Traact_Logo_Blue%20(1)-1.png)
Types of Documents
In your workspace, you can add, view, and edit a variety of document types, including PDF, DOCX, PPTX, and XLSX.
There are two ways to add a document to your workspace. You can add a document using the "Data Room” or by selecting a specific entity.
Data Room Step-by-Step
Step 1: Select Data Room on the left menu bar;
Step 2: Click Data Room Items;
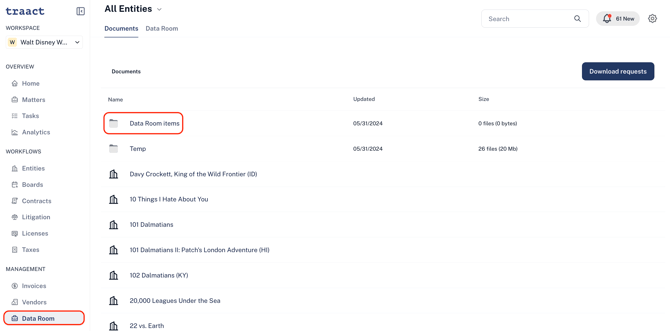
*Temp contains all matters that were created which do not have a document attached.*
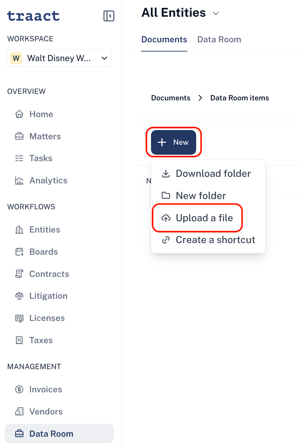
Step 3: Finally, select “+ New” and “Upload a File”. Users are also able to select multiple files at the same time.
Users may also upload a document by dragging it from their desktop and dropping it into Traact.
Specific Entity Step-by-Step
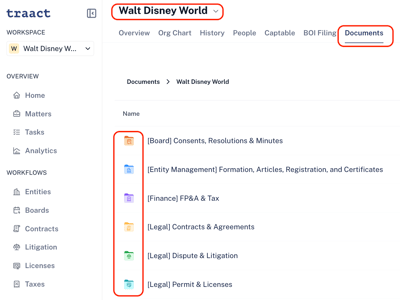
Step 1: Select the desired entity;
Step 2: Select "Documents";
Step 3: Select the desired Module: Board; Entity Management; Finance; Contracts; Dispute & Litigation; or Permit & Licenses;
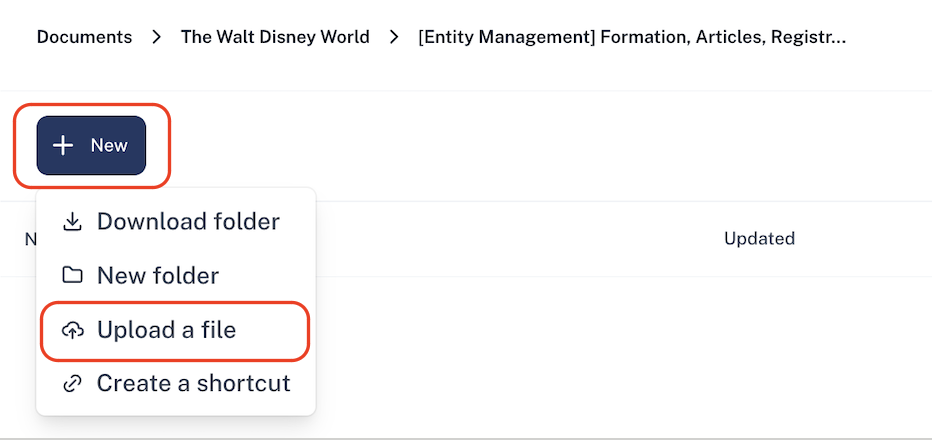
Step 4: Once the folder is selected, select "New" > "Upload a File". Users are also able to select multiple files at the same time.
Users may also upload a document by dragging it from their desktop and dropping it into Traact.
Document Actions
Find below the available actions for managing documents.
-
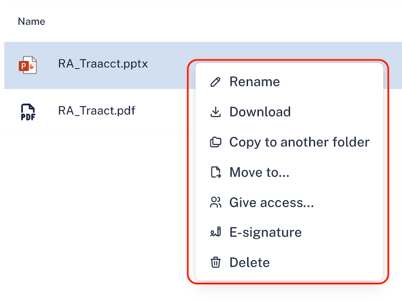
Rename: Users can rename the document to a new title.
-
Download: Users can download the document from Traact to their desktop.
-
Copy to another folder: Users can create a duplicate of the document in a different folder. After selecting this option, users will choose the desired entity and folder for the copy.
-
Move to: Users can move the document to a different entity or folder.
-
Give Access: Users can set the document to private and restrict access to specific individuals.
-
E-Signature: Users can electronically sign any document through Traact.
-
Delete: Users can permanently delete the document from Traact.
How and Where to Find a Document
-
Folder View
In each module, you'll see a "Folder View" tab. This tab allows you to view all current documents within that module for a desired entity.
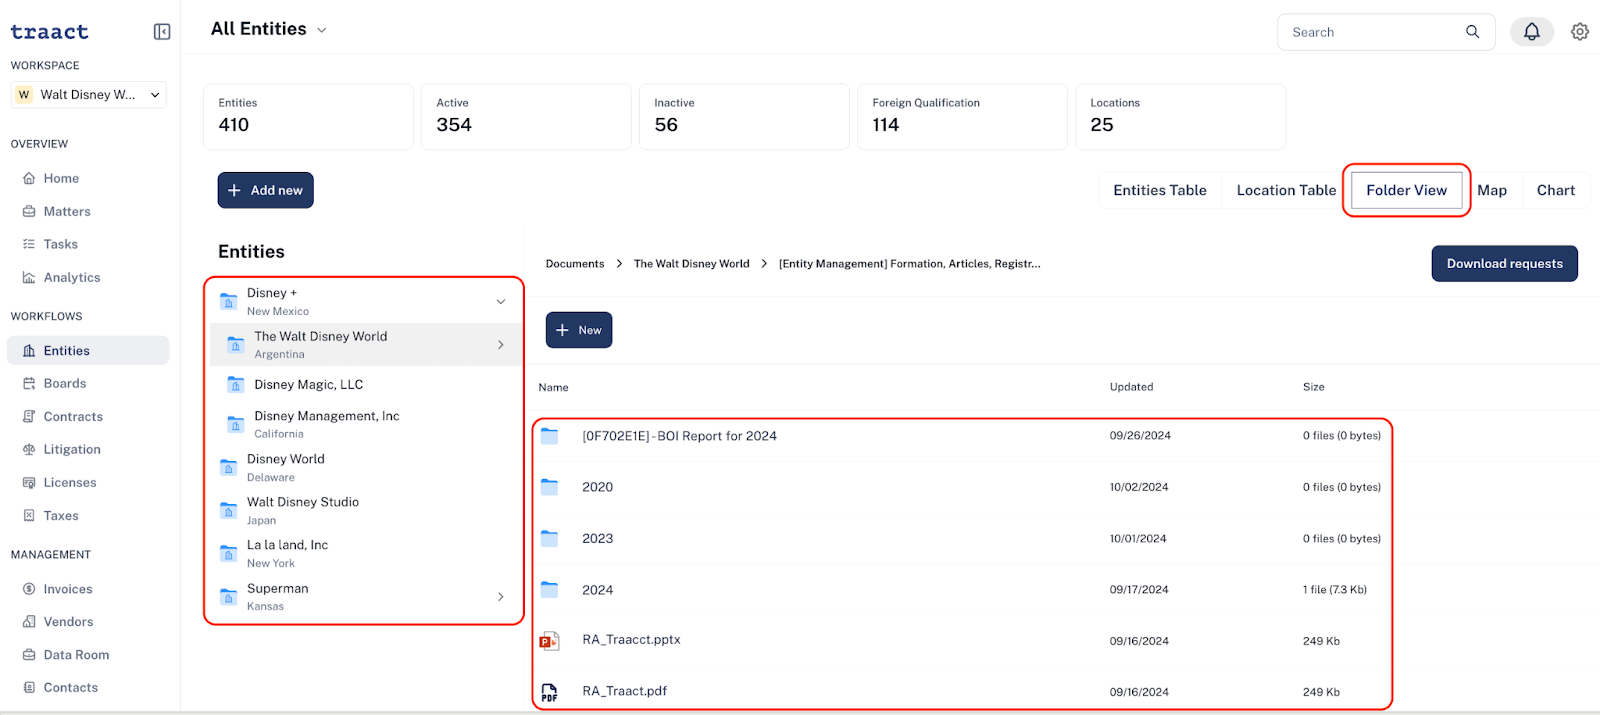
For example, in the Entity Module, the Folder View enables you to quickly browse all documents within each entity. You can also perform actions on these documents, like renaming, granting access, downloading, and more, as outlined on the previous page.
Entity Document Tab
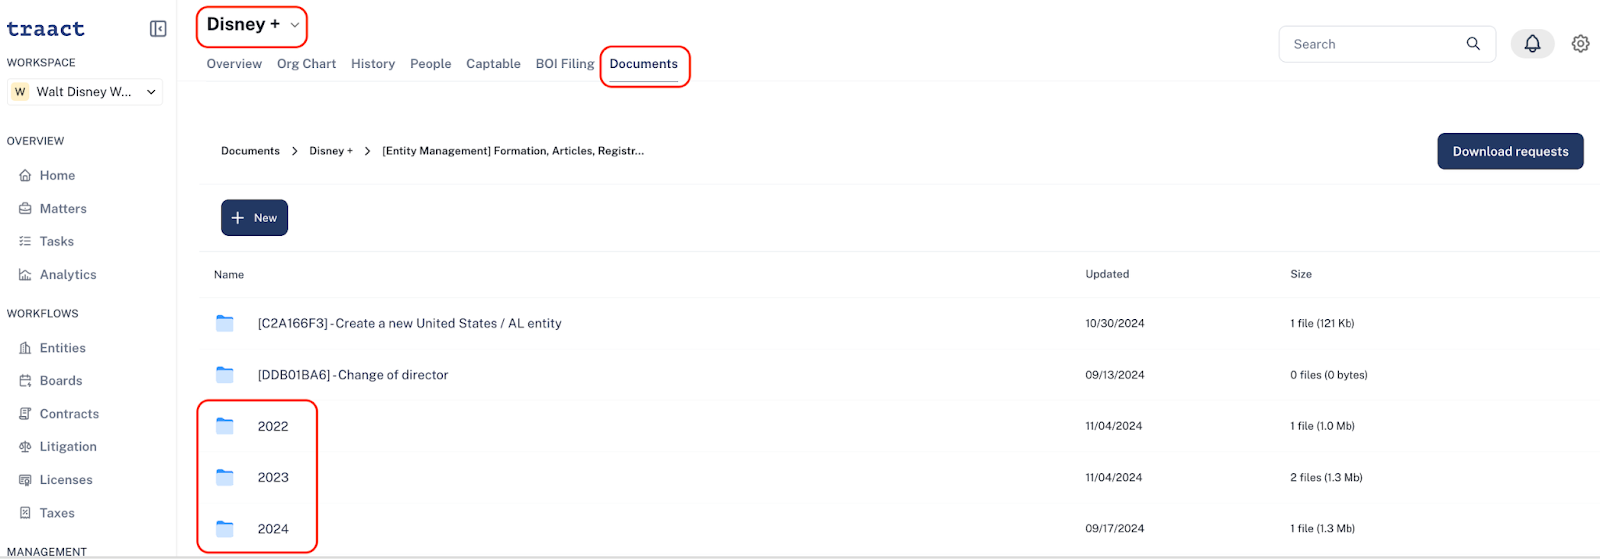
Within each Entity, you'll find a Documents Tab organized by yearly folders. Each folder contains documents issued during the corresponding year. If Traact is your registered agent, you’ll find all service-related documents—such as Annual Reports, Amendments, Dissolutions, and Certificates—in these annual folders.
Search Inside Documents
Easily find files by name, content, or location to streamline workflows and save valuable time.
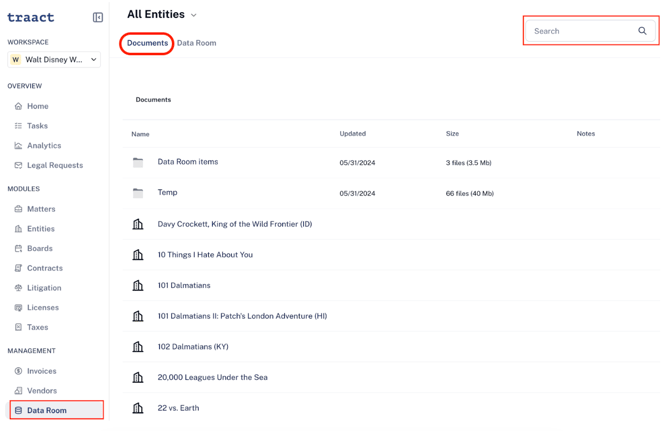
Step 1: Select "Data Room" from the left menu bar, on the documents tab.
Step 2: Search for a word in a file by name, document titles, notes and location.
Step 3: Return all documents that contain that word.
Step 4: The searched word should appear highlighted in yellow within the document preview.
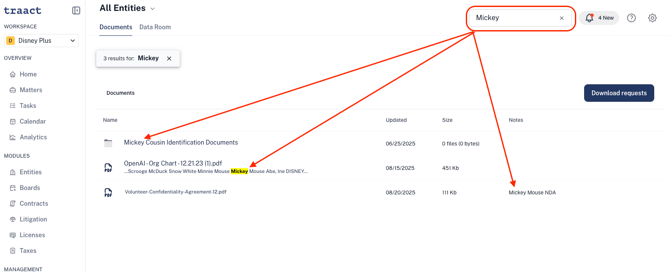
⚠️ Attention: If a document is poorly formatted or a very tricky file type, it may not index perfectly yet. Powerful, not omniscient. We’re on it.
How to add Folder and Document Descriptions/Notes
You can add helpful descriptions or notes to folders and documents, allowing other users to easily understand the contents without needing to open them. This feature helps keep things organized and provides quick context for everyone.
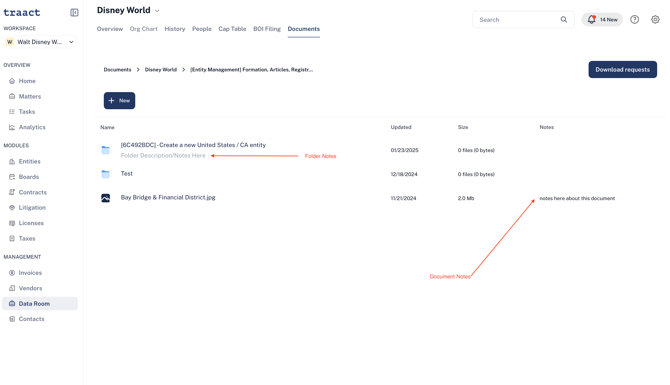
To Add a Folder Note or Description:
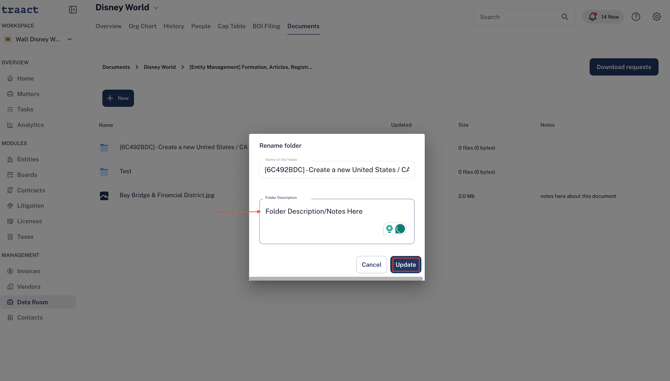
Step 1: Left-click on the folder you'd like to add a description to and select Edit
Step 2: Add description
Step 3: Select Update
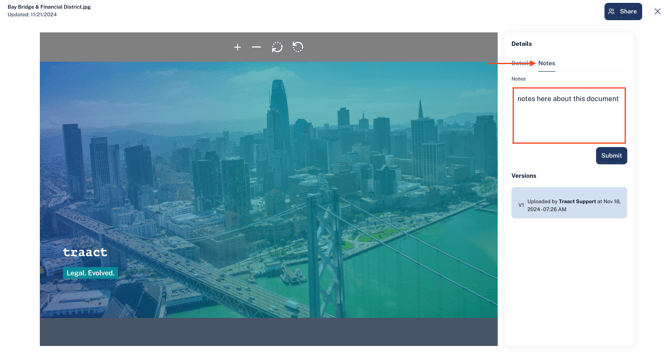
To Add a Document Note or Description:
Step 1: Open the document you'd like to add a description to
Step 2: Select "Note"
Step 3: Add the note or description and select Submit
How to create a shortcut
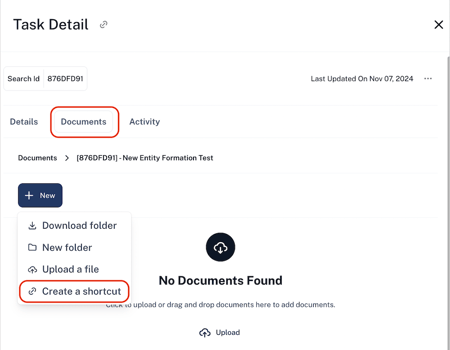
A shortcut is a feature to add to a task or matter on a specific website along with the documents.
Step 1: Access the preferred matter or task;
Step 2: Click on “Documents”;
Step 3: Then, click on “New” and “Create a Shortcut”;
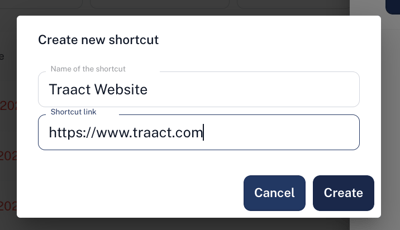
Step 4: Fill out the shortcut fields with your website preference;
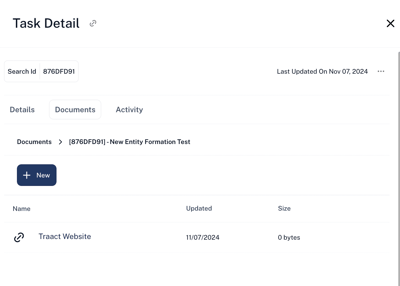
Step 5: Your shortcut will be linked to the matter/task created under Documents
If you have any questions or need assistance with a request, please contact your Customer Success Manager or reach out to the Traact Support team.