-1.png?width=151&height=28&name=Traact_Logo_Blue%20(1)-1.png)
How to Add a DBA to an Entity
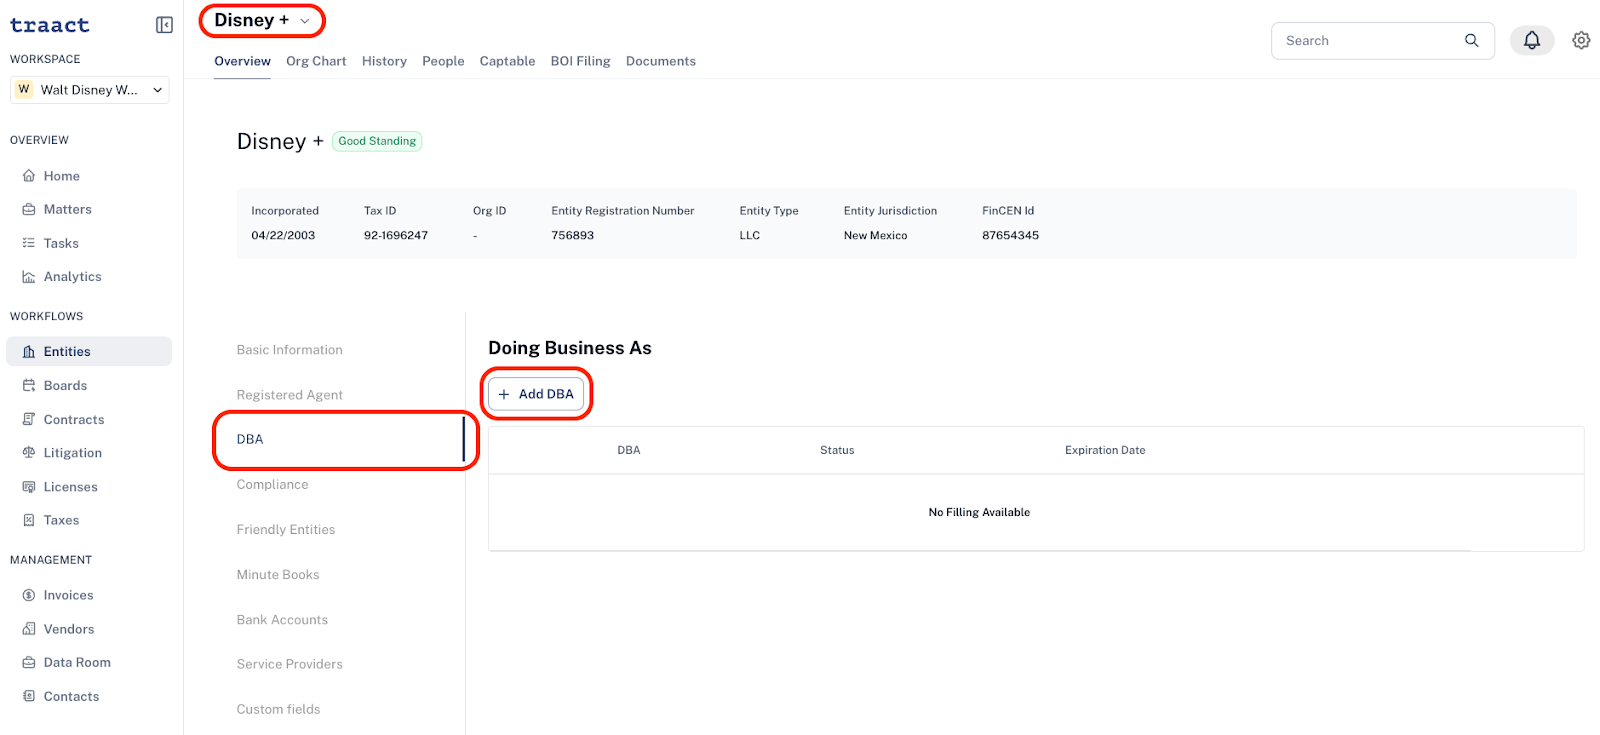
Step 1: On the main entity page, select the desired entity to which you wish to add the DBA;
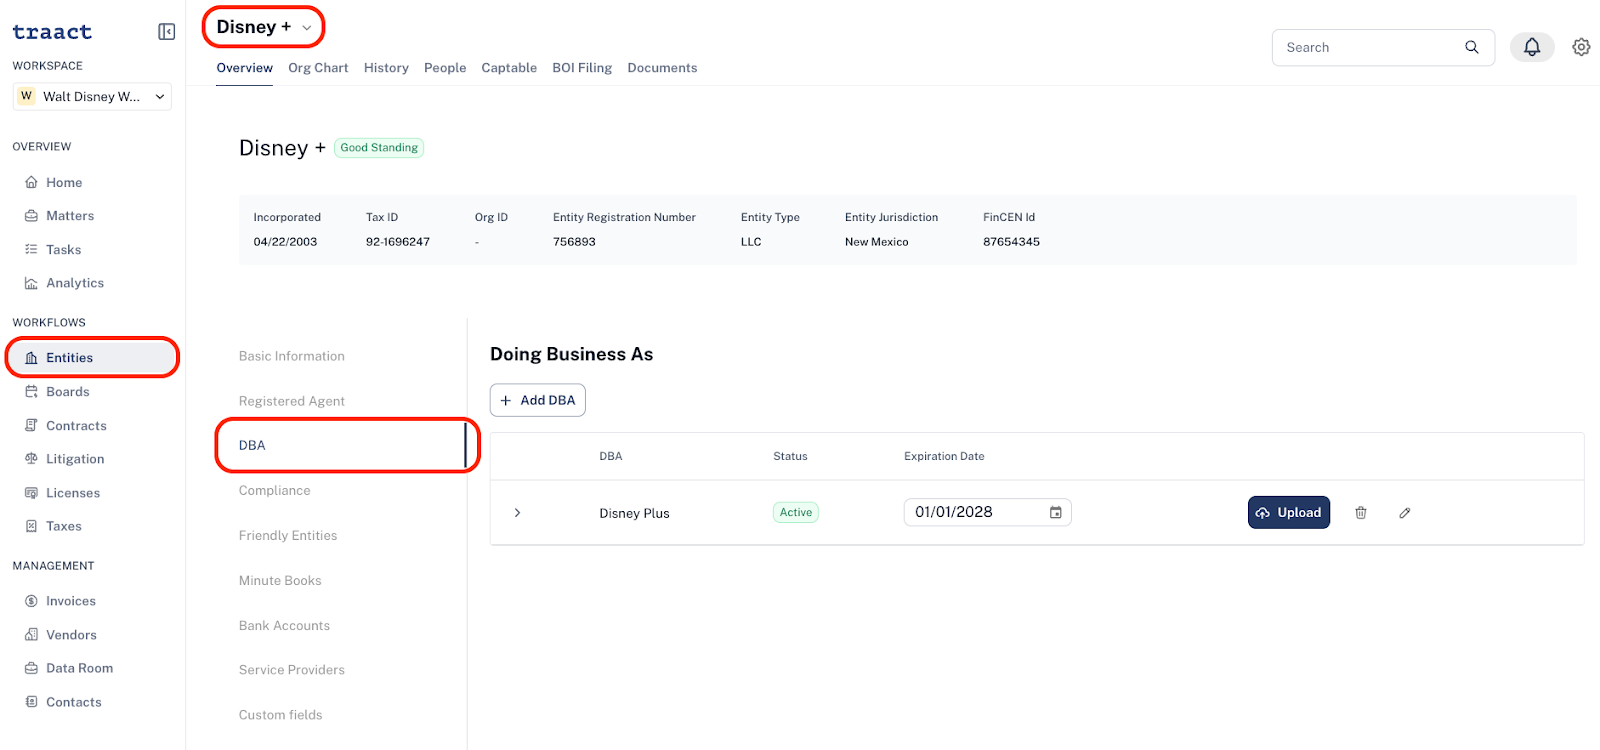
Step 2: Navigate to the “DBA” tab and click on “Add DBA”;
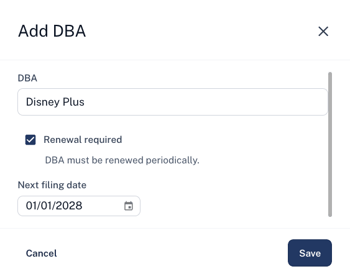
Step 3: Enter the DBA name and indicate whether a renewal is required based on jurisdiction/county rules or if the DBA is perpetual, then click “Save”;
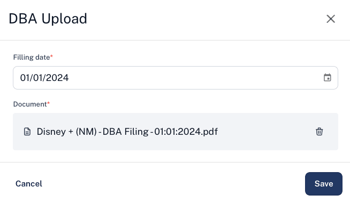
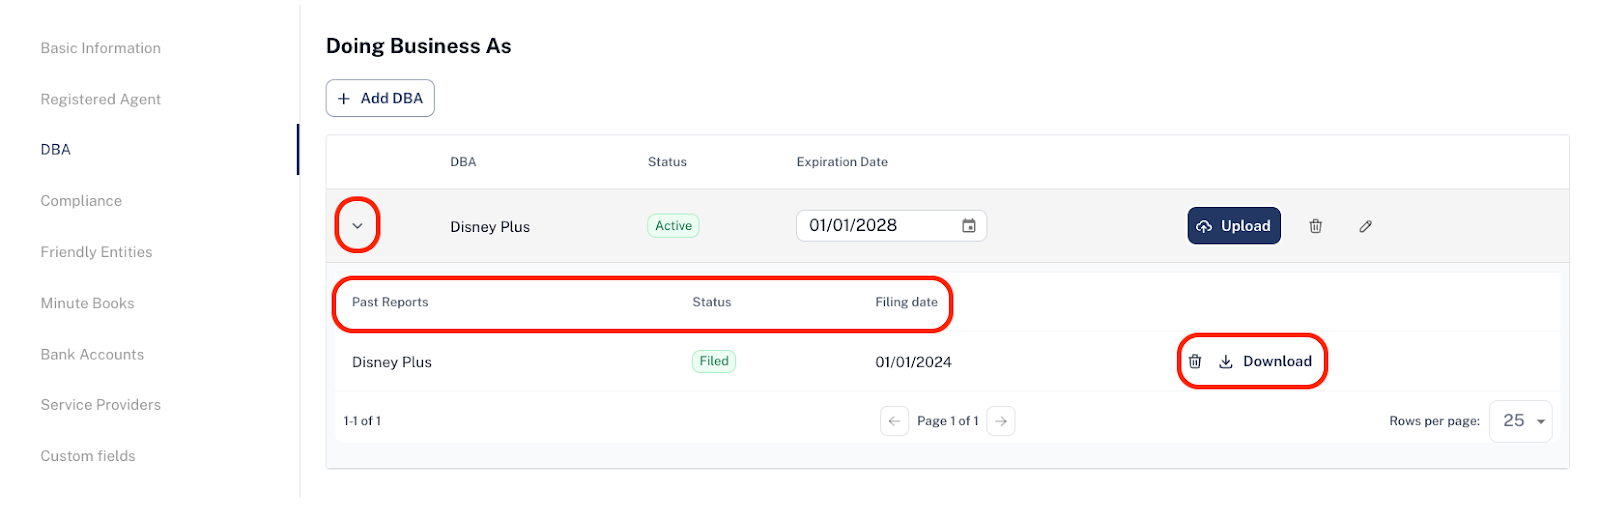
Step 4: After saving the DBA name and next filing date, upload the DBA filing;
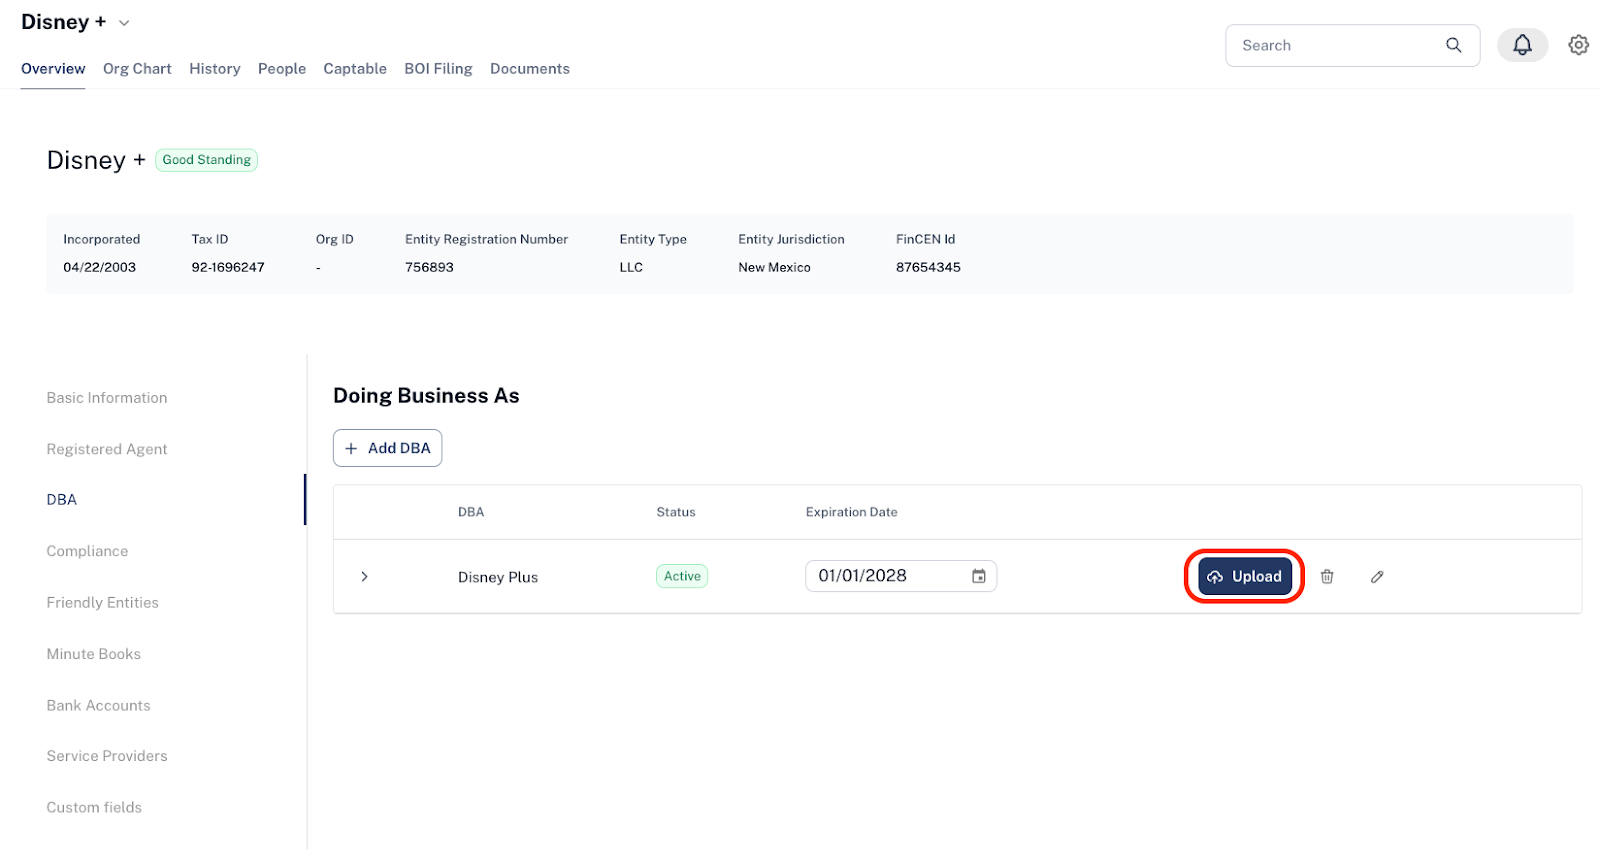
Step 5: Finally, click the arrow to view more information about the DBA, including its status, filing dates, an option to download the DBA filing document, or an option to delete it.
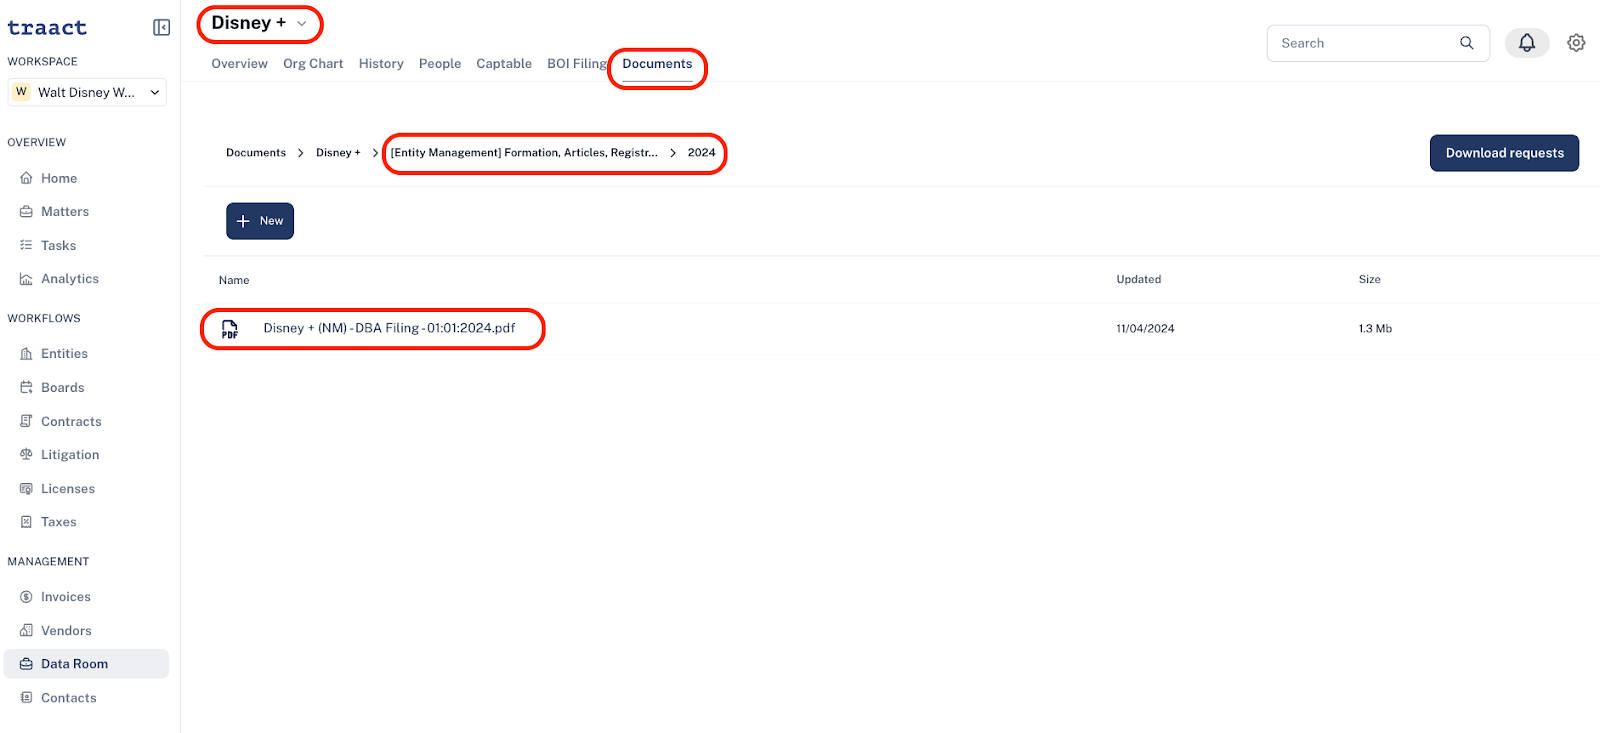
Note: The uploaded DBA document will also be automatically saved under the “Documents” tab for the selected entity, organized by the year of filing.
How to Edit a DBA
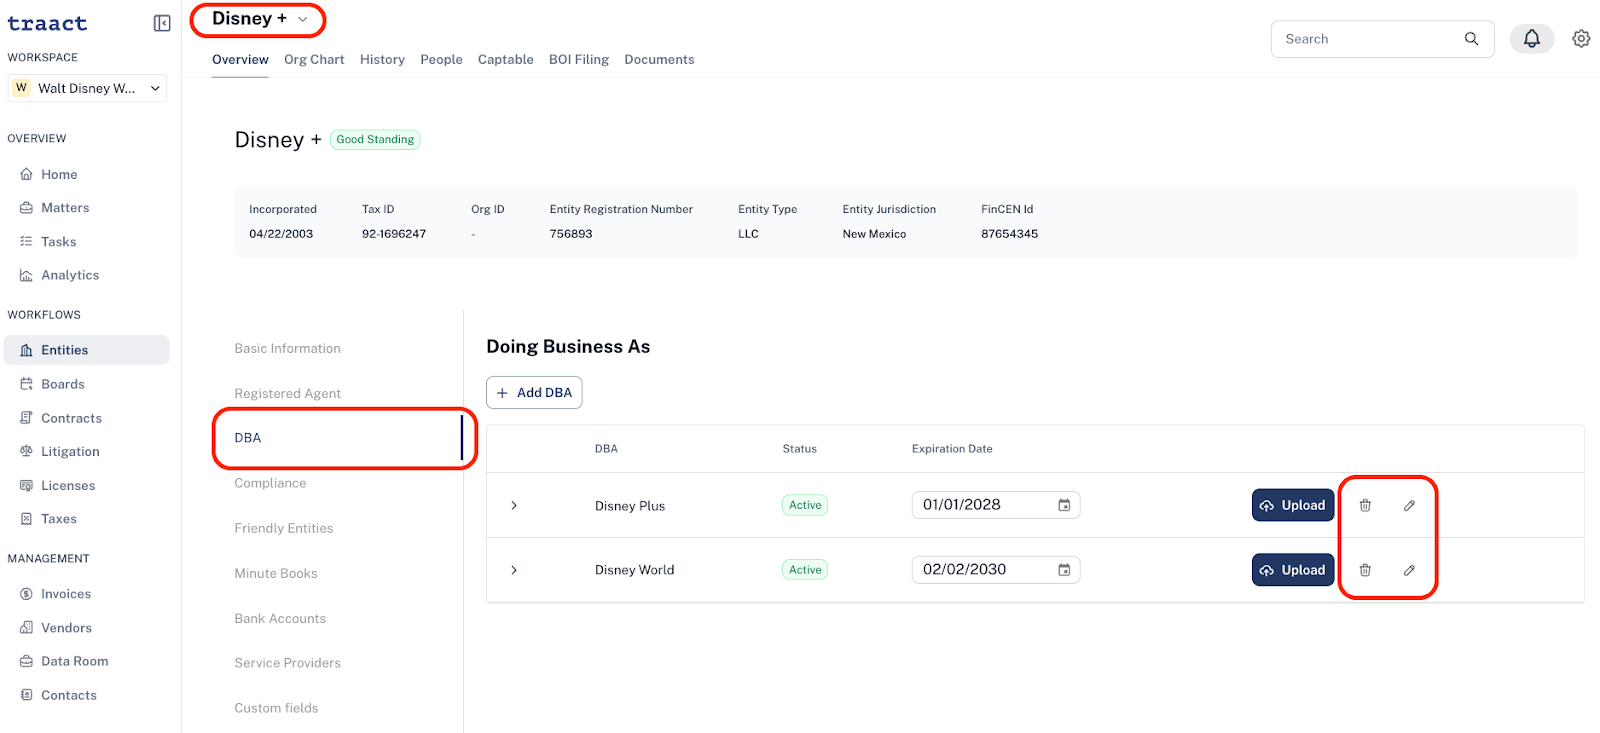
Step 1: On the main entity page, select the desired entity;
Step 2: Navigate to the “DBA” tab;
Step 3: Each DBA will be displayed separately where you can edit or delete the information as needed.
Where Will the DBA Name Be Displayed?
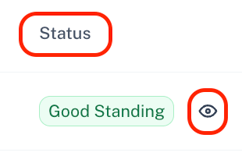
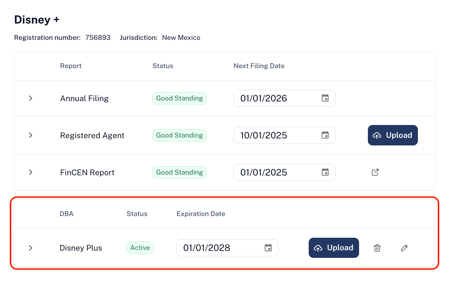
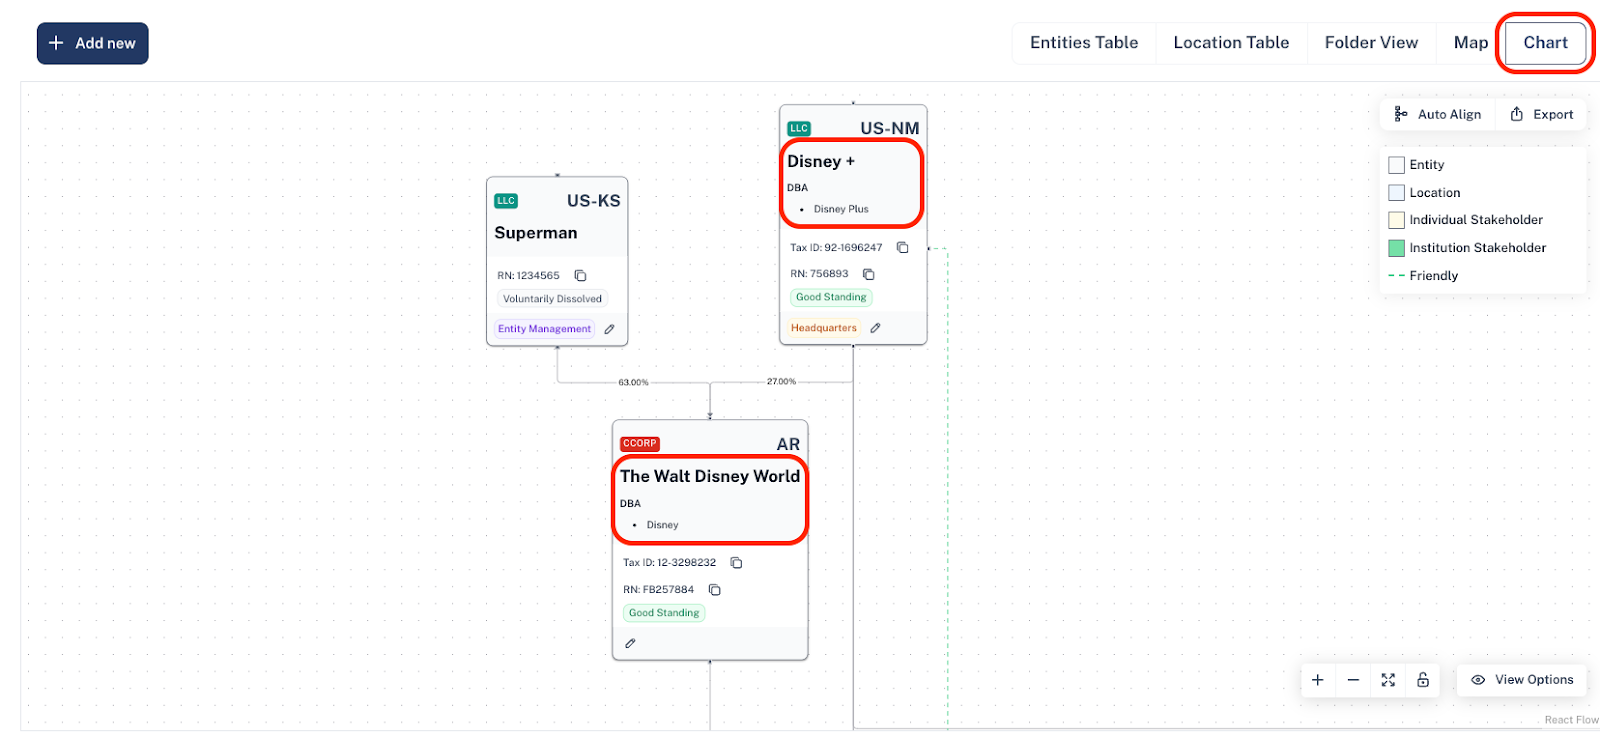
The DBA name will be displayed in the main entity table, in the compliance drawer (accessible from the main entity page by clicking on the eye icon under the status column), organizational chart, and within the specific entity under the “DBA” tab.
-
Entity Table:

-
Compliance Drawer:
-
Organizational Chart:
-
DBA Tab inside an entity:
Need Help?
If you have any questions or need assistance with a request, please contact your Customer Success Manager or reach out to the Traact Support team.