-1.png?width=151&height=28&name=Traact_Logo_Blue%20(1)-1.png)
What is a Legal Request?
A legal request is a structured process for collecting information to assess and address legal needs. It standardizes requests, streamlines workflows, and captures all necessary details, enabling the legal team to handle matters efficiently and effectively.
Managing Legal Requests
Step 1: Navigate to the Matters module in the Overview section of your Navigation Menu.
Step 2: Navigate to the Intake tab.
Managing Submissions
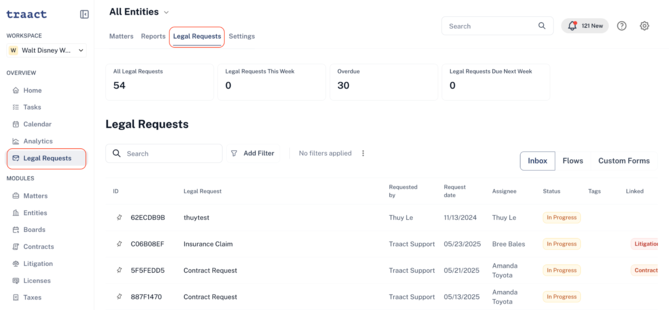
The Legal Request tab provides an overview of all legal requests submitted through forms or emails. From here, you can track, filter, and manage incoming requests efficiently.
Understanding your Dashboard
-
Inbox: This section collects all incoming legal request submissions. Users can review, manage, and respond to submitted requests.
-
Flows: This section allows users to create and configure legal request workflows.
-
Custom Forms: Create and configure custom forms for legal requests.
Filtering and Searching Legal Requests
Use the following options to locate specific requests quickly:
-
Filter by Entity – Select an entity from the dropdown at the top of the screen to view only requests related to that entity.
-
Search Bar – Enter keywords to search for specific requests.
-
Filter by Assignees and Collaborators – Narrow down requests based on the assigned team members or contributors.
-
Filter by Statuses – View only requests that are pending, in progress, completed, or overdue.
-
Filter by Tags – Apply relevant tags to organize and find requests based on custom categories.
Request Overview & Stats
At the top of the Intake tab, you can quickly review key metrics:
-
All Legal Requests – The total number of submitted legal requests.
-
Legal Requests This Week – Requests were received this week.
-
Overdue – Requests past their due date.
-
Legal Requests Due Next Week – Requests scheduled for completion in the upcoming week.
These tools help ensure legal requests are tracked and addressed efficiently.
Creating a New Custom Form
If your Legal Request flow requires a form for submitters to fill out, you'll need to create a custom form first. Follow these steps:
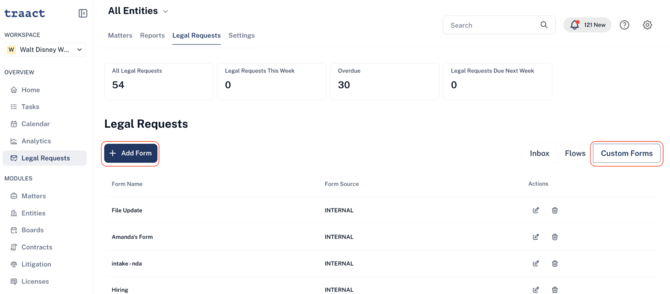
Step 1: On the right-hand side, click “Custom Forms”, then select “+ Add Form;”
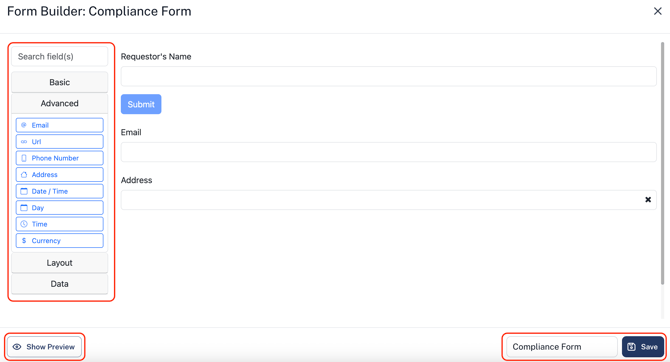
Step 2: Simply drag and drop the custom fields to design your form. Once complete, provide a name for the form and save it. To preview how the form will appear to the requestor, click "Show Preview."
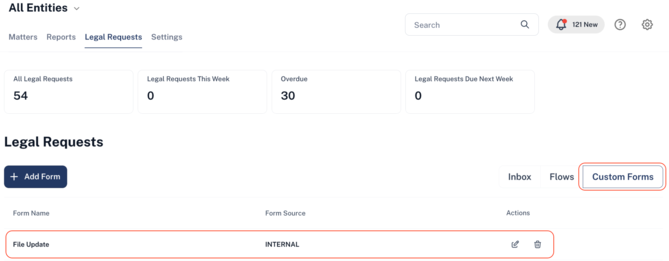
Step 3: After the form is created, it will be saved under the "Custom Forms" tab and will be ready for use. Use the pencil icon to edit it, or click on the trash icon to delete it.
Creating a New Legal Request flow from a Form
Step 1: Navigate to the "Flows" tab and click "Add Intake Flow."
Step 2: Complete the following required fields:
-
Title – Provide a clear name for the legal request.
-
Description – Add relevant details about the request.
-
Assignee & Collaborators – Select individuals responsible for managing the request and receiving notifications.
-
Input Method – Choose “Form” as the input method and complete the required and optional fields to configure your legal service request flow, then save your changes.
-
Advanced Options – Configure additional settings, such as naming convention, confidentiality controls, entity selection, and domain restrictions.
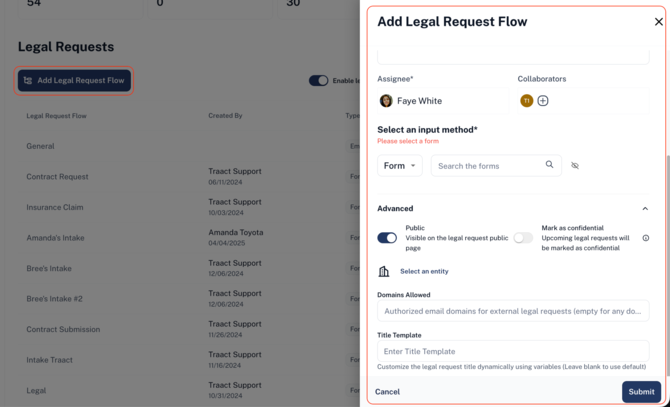
Step 3: Once all your desired details are filled out, click on “Submit.”
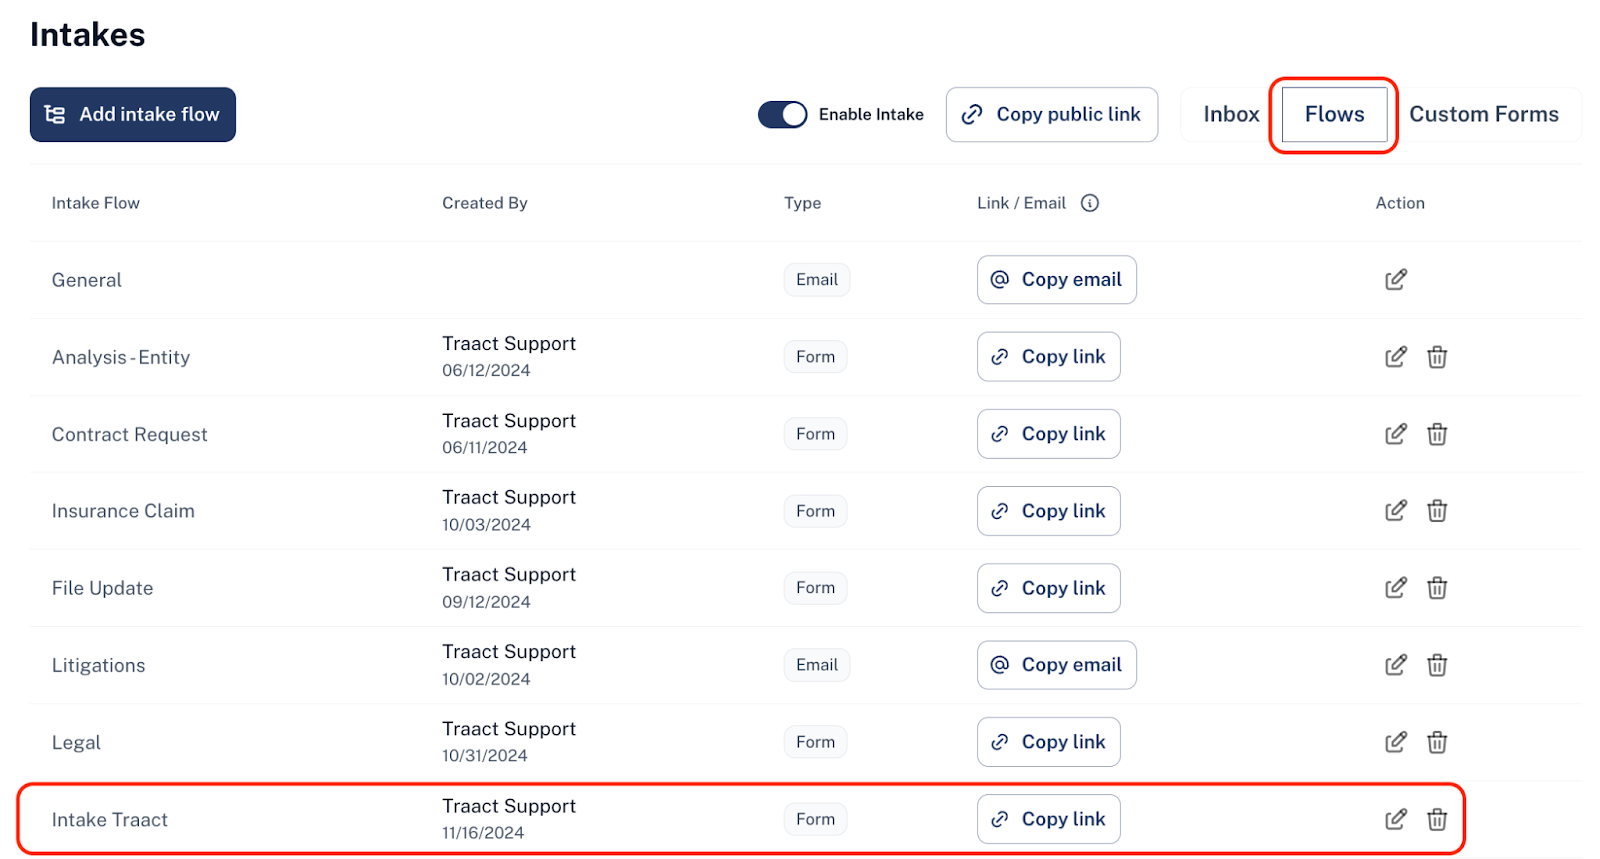
Step 4: Finally, the intake flow via form is done! Copy and share the link to start receiving requests in your Traact workspace, which will appear under the "Inbox" tab.
You may also use the pencil icon to edit, or click on the trash icon to delete the Intake Flow.
Creating a New Legal Request flow from an Email
Step 1: Navigate to the "Flows" tab and click "Add Legal Request Flow;"
Step 2: Complete the following required fields:
-
Title – Provide a clear name for the legal request.
-
Description – Add relevant details about the request.
-
Assignee & Collaborators – Select individuals responsible for managing the request and receiving notifications.
-
Input Method – Choose “Email” as the input method and enter a routing email.
-
Advanced Options – Configure additional settings, such as confidentiality controls, entity selection, and domain restrictions.
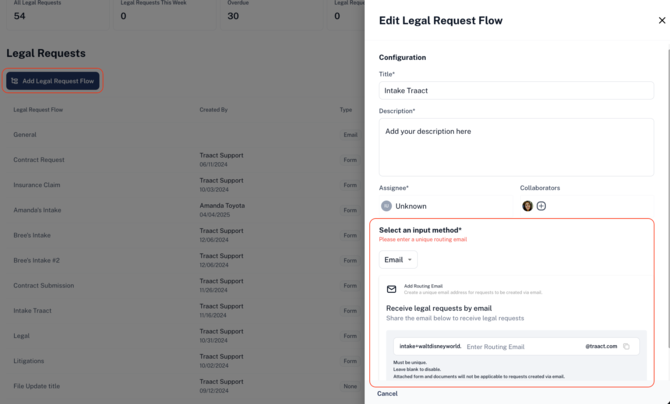
Step 3: Once all your desired details are filled out, click on “Submit.”
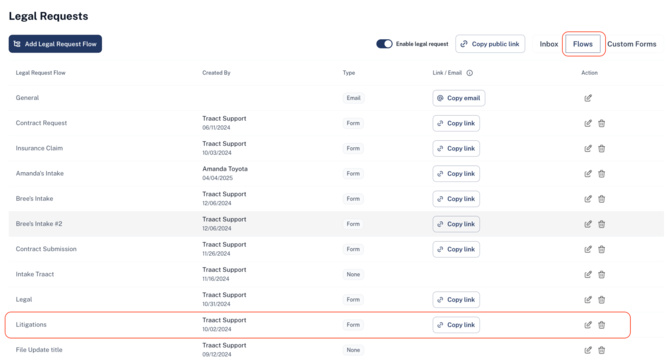
Step 4: Finally, the legal service request flow via email is done! Click on “Copy Email” and share the routing address with your audience to start receiving requests in your Traact workspace, which will appear under the "Inbox" tab.
You may also use the pencil icon to edit, or click on the trash icon to delete the Intake Flow.
Setting Up Naming Conventions for Intake
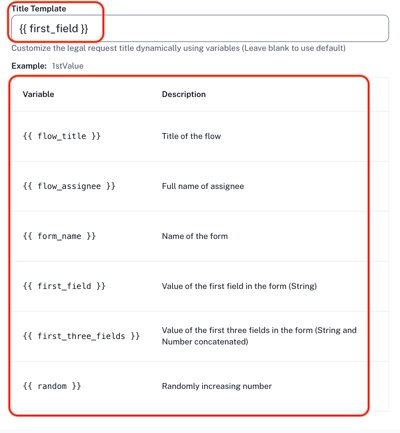
When setting up a legal request flow, you can define a title template to standardize intake names upon submission. Follow these steps to create a title template:
Step 1: In the intake flow setup, scroll down to the Advanced Settings and locate the "Title Template" field.
Step 2: Customize the intake title by simply copying and pasting from the available variables into the Title Template field.
Step 3: Once saved, the incoming intake for the specific flow will follow the defined naming convention.
Managing Received Submissions
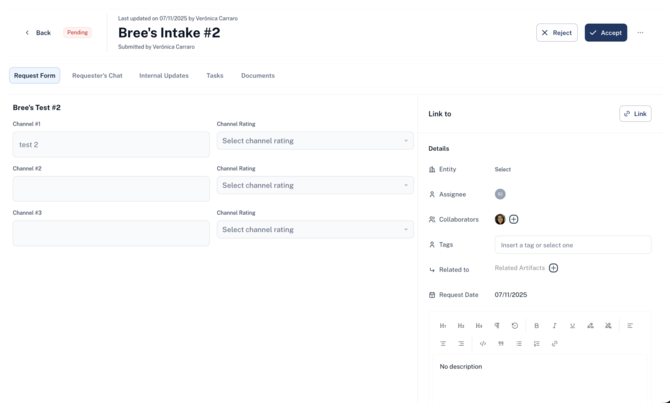
In order to manage existing submissions, follow these steps:
Step 1: Go to the Legal Request tab and click Inbox to view all received submissions.
Step 2: Click on the desired submission to review its details.
Step 3: If the request was submitted via form, you will see the " Form" tab, displaying the requestor's responses. If the request was submitted via email, the submitted details will appear in the Description section at the bottom left of your screen.
Step 4: Once you have reviewed the submission, you may manage communication and documents and determine whether you will proceed with the request. You can either click “Accept” or “Reject” the submission. Note that the requester will receive a notification of what action was taken.
Step 5: Once the Request has been processed, you may also mark it as “Complete” or link it to an Artifact within a Module like a Matter, Contract, Litigation, or Board, if you subscribe to those features.
Linking a Legal Request to a Legal Artifact
A Legal Request can be linked to:
-
Matters
-
Boards
-
Contracts
-
Litigation
-
Licenses/Permits
How to Link a Request
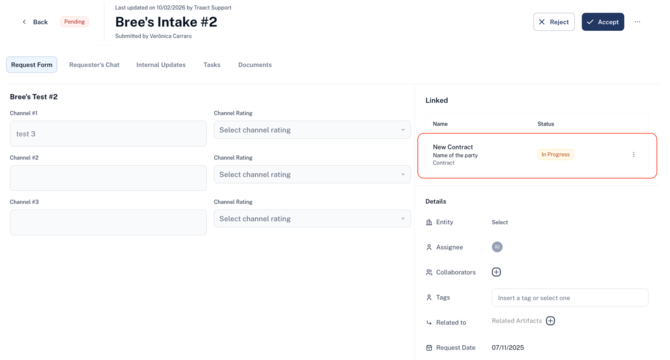
Step 1: Open the Legal Request Submission page;
Step 2: Click Link next to the request;
Step 3: Select the artifact type (e.g., Contract, Litigation);
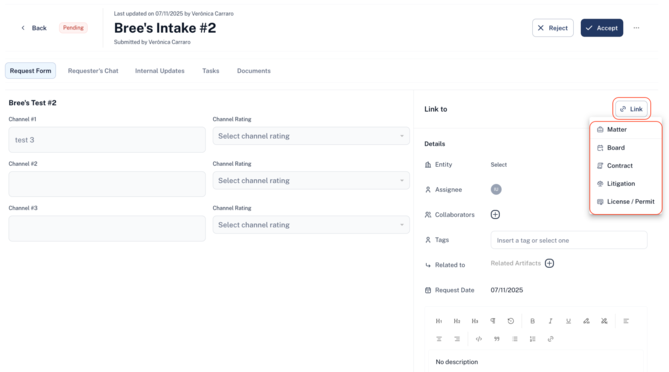
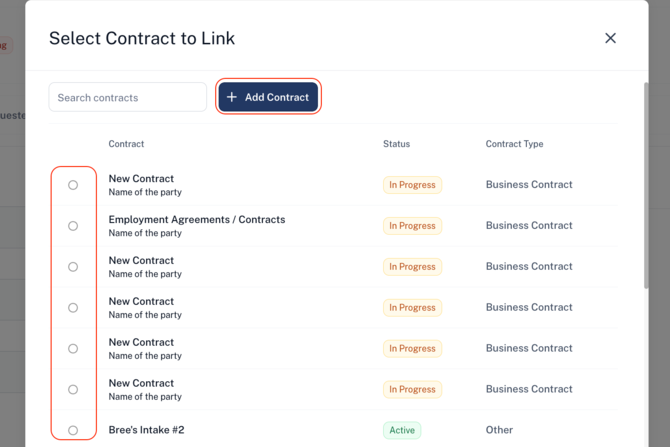
Step 4: Once you select the artifact type, you can choose an existing artifact or create a new artifact within this flow.
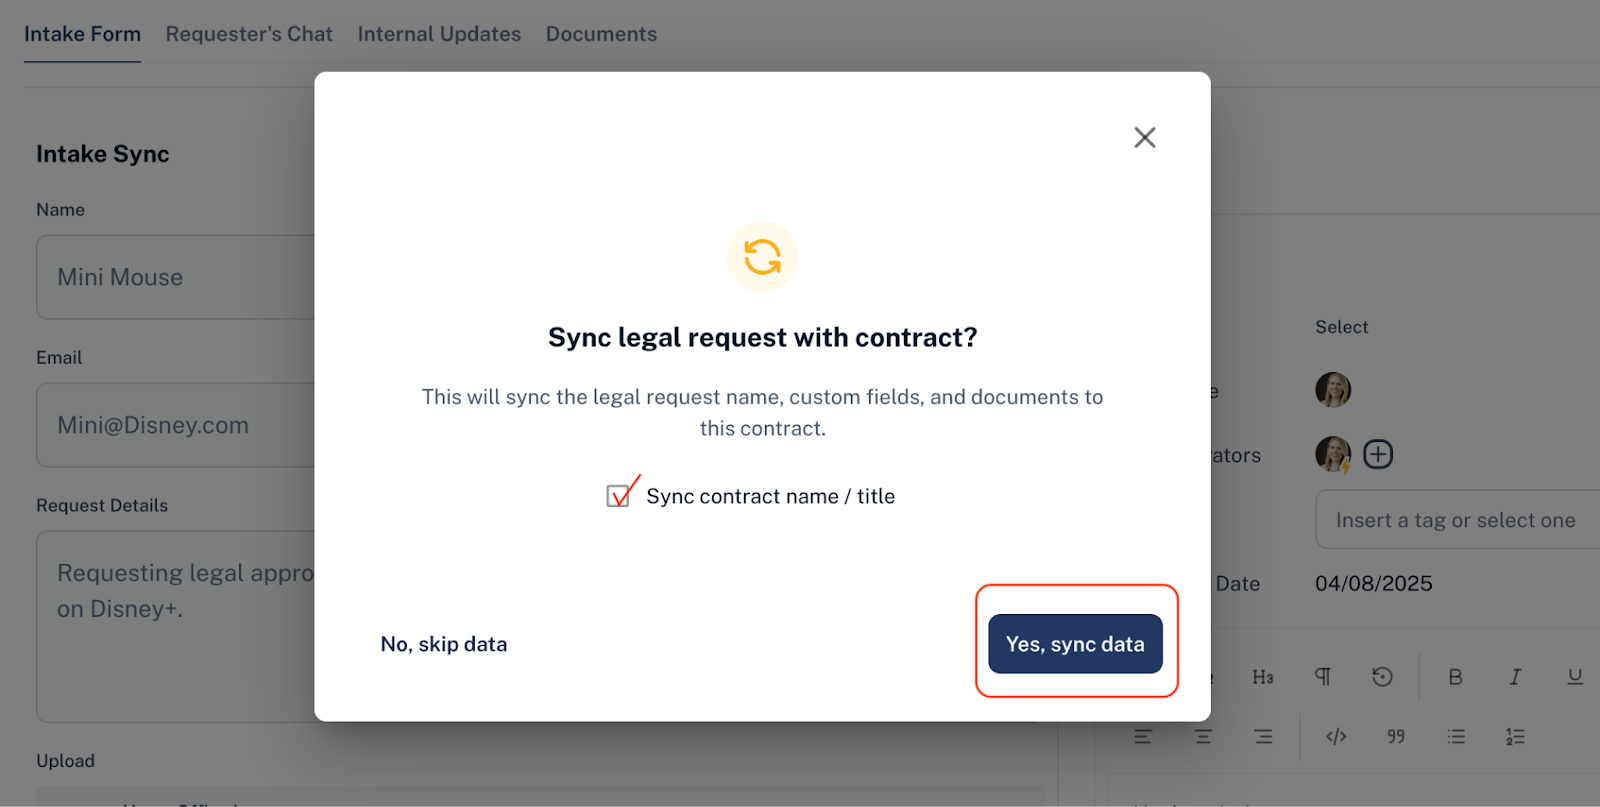
Step 3: You can sync details like the name, title, custom fields, and documents from the Legal Request into the artifact.
-
Check “Sync contract name/title” if you want the Legal Request name to become the name of the artifact.
-
Select “Yes, sync data” if you want the custom fields within the Legal Request will be auto-populated into the custom fields of the artifact if the field name and type are a direct match.
-
Select, “No, skip data” if you want to link the legal request but not import the custom fields.
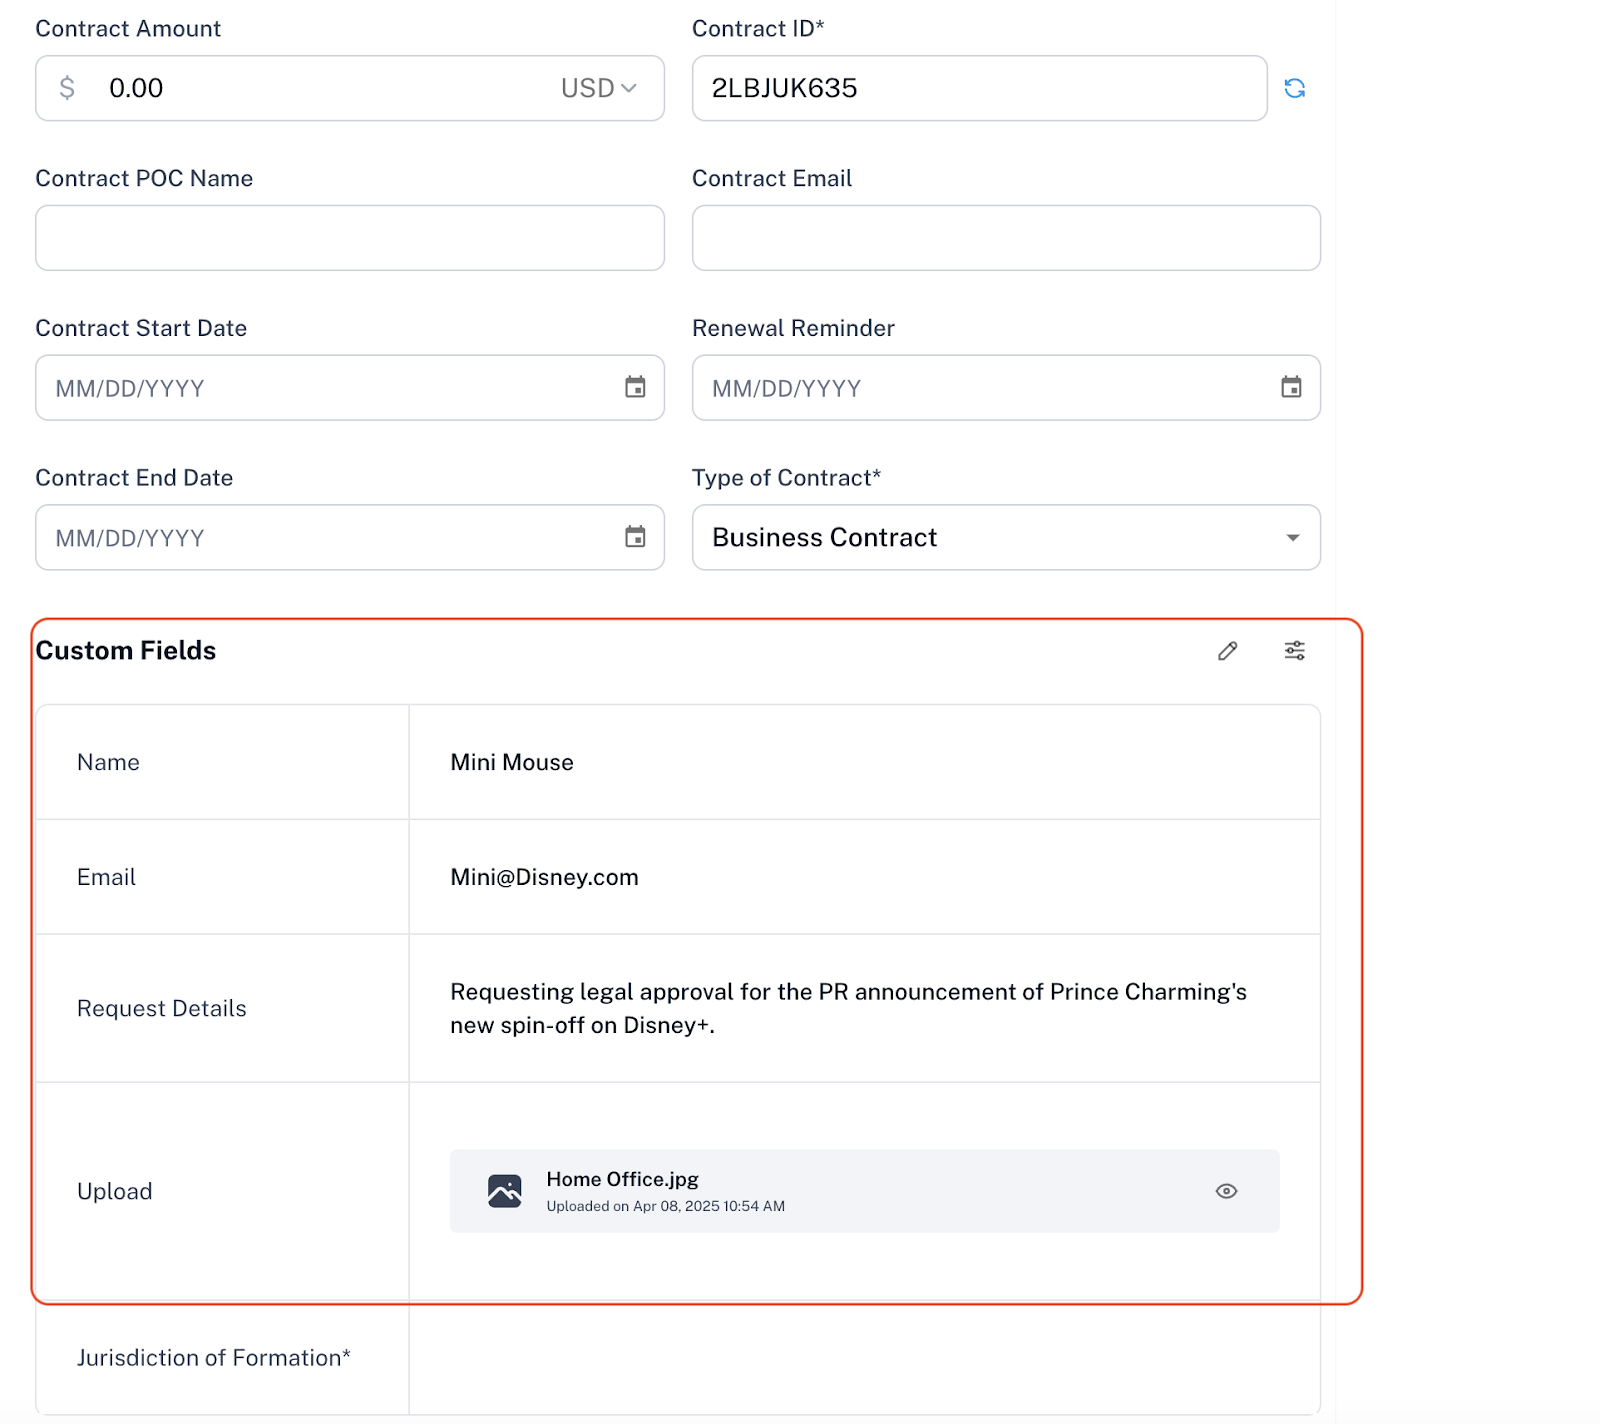
Important Note: The custom fields within the Legal Request will ONLY be auto-populated into the custom fields of an artifact IF the field name and type are a direct match.
Step 4: Navigate to the artifact by clicking on the link within the Legal Request. All fields within the Legal Request that directly match a Custom Field within the artifact should be present, including all documents.
Communication for Legal Requests:
Once a request is submitted, communication can be managed in two tabs under the submission page:
-
Requestor’s Chat - This feature facilitates direct communication with external requestors. Requestors can engage via their submission page or by replying to email notifications sent by Traact. The process works as follows:
-
External requestors receive intake-related emails from ‘Traact Notification.’
-
When they reply to the notification email, their response is automatically logged in the Requestor’s Chat within Traact.
This ensures the conversation history remains intact for the requestor, while maintaining a clear and organized internal record of all interactions.
-
Internal Updates - These are used for internal updates between Traact users.
Upload and Manage Documents
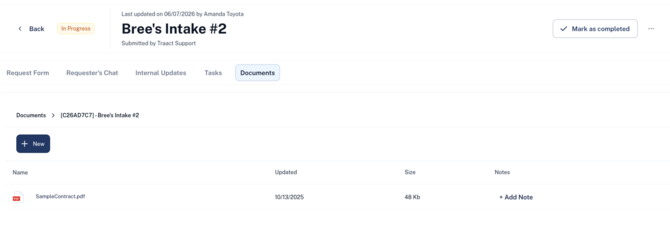
You may also navigate to the Documents tab within the submission, manage folders, upload relevant files, and complete downloads.
If you have any questions or need assistance with a request, please contact your Customer Success Manager or reach out to the Traact Support team.