-1.png?width=151&height=28&name=Traact_Logo_Blue%20(1)-1.png)
A legal matter is any situation that requires legal attention, whether it’s litigation, contract negotiations, compliance checks, or investigations. These matters encompass a broad range of issues, including disputes, regulatory concerns, employment matters, and intellectual property protections. Effective management is key for organizations to handle risks, stay compliant, and resolve issues efficiently.
Understanding Your Matter Dashboard
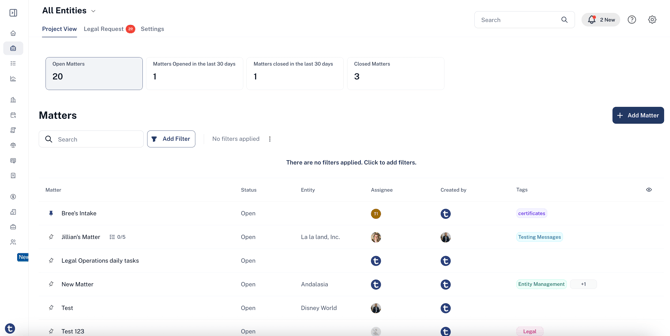
At the top of your Entity home page, you will find three tabs:
-
Project View: The main view is where your matters are created and managed.
-
Legal Intake: Further details are provided in the following document
-
Practice Areas: More information is available in the referenced document.
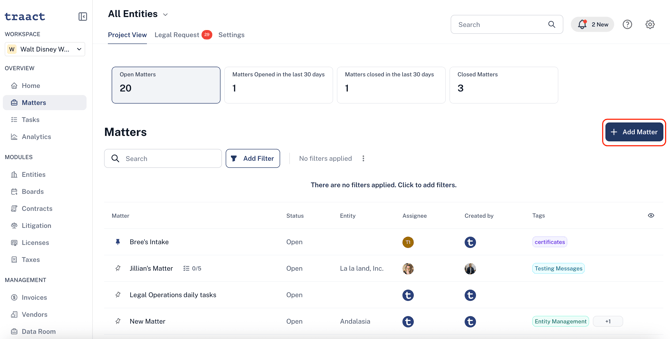
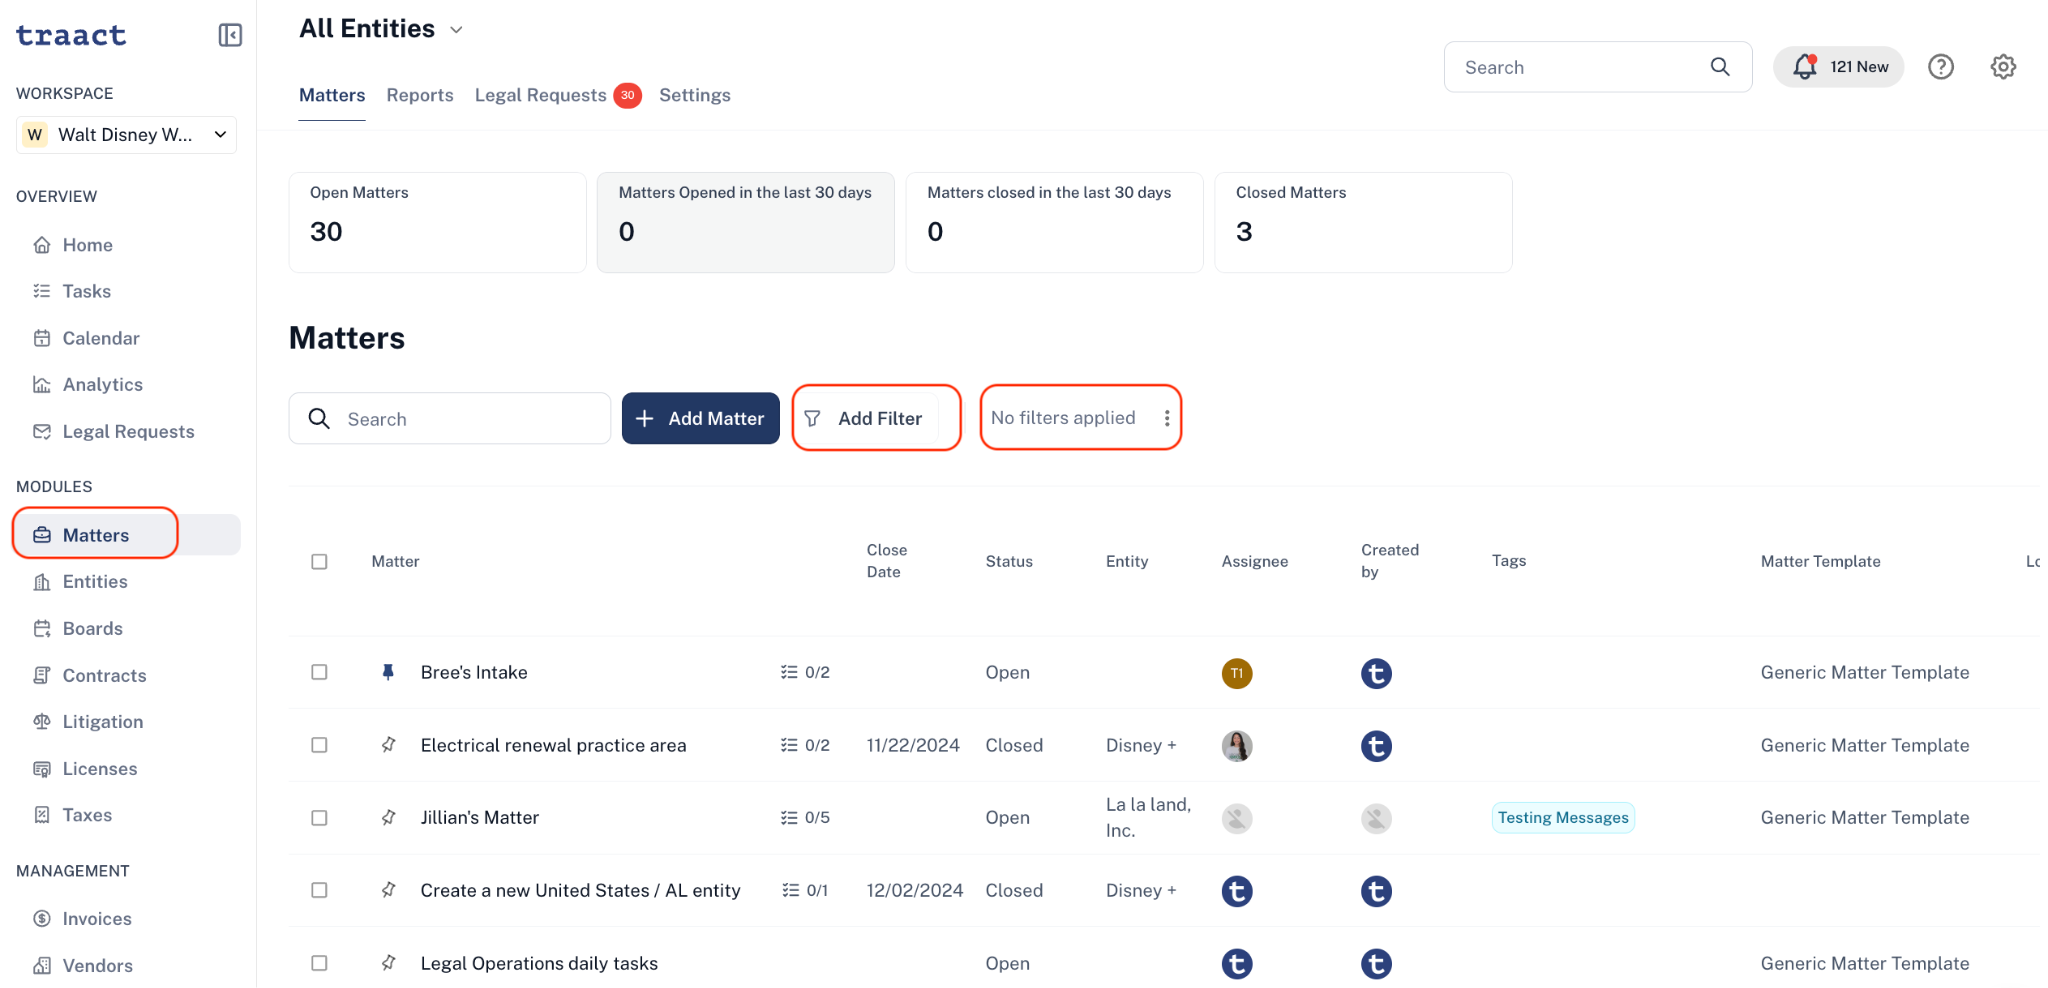
Additionally, you have an analytics overview displaying your Open Matters, Matters Opened in the last 30 days, Matters Closed in the last 30 days, and Closed Matters. A search bar is also available to help you easily find the desired matter.
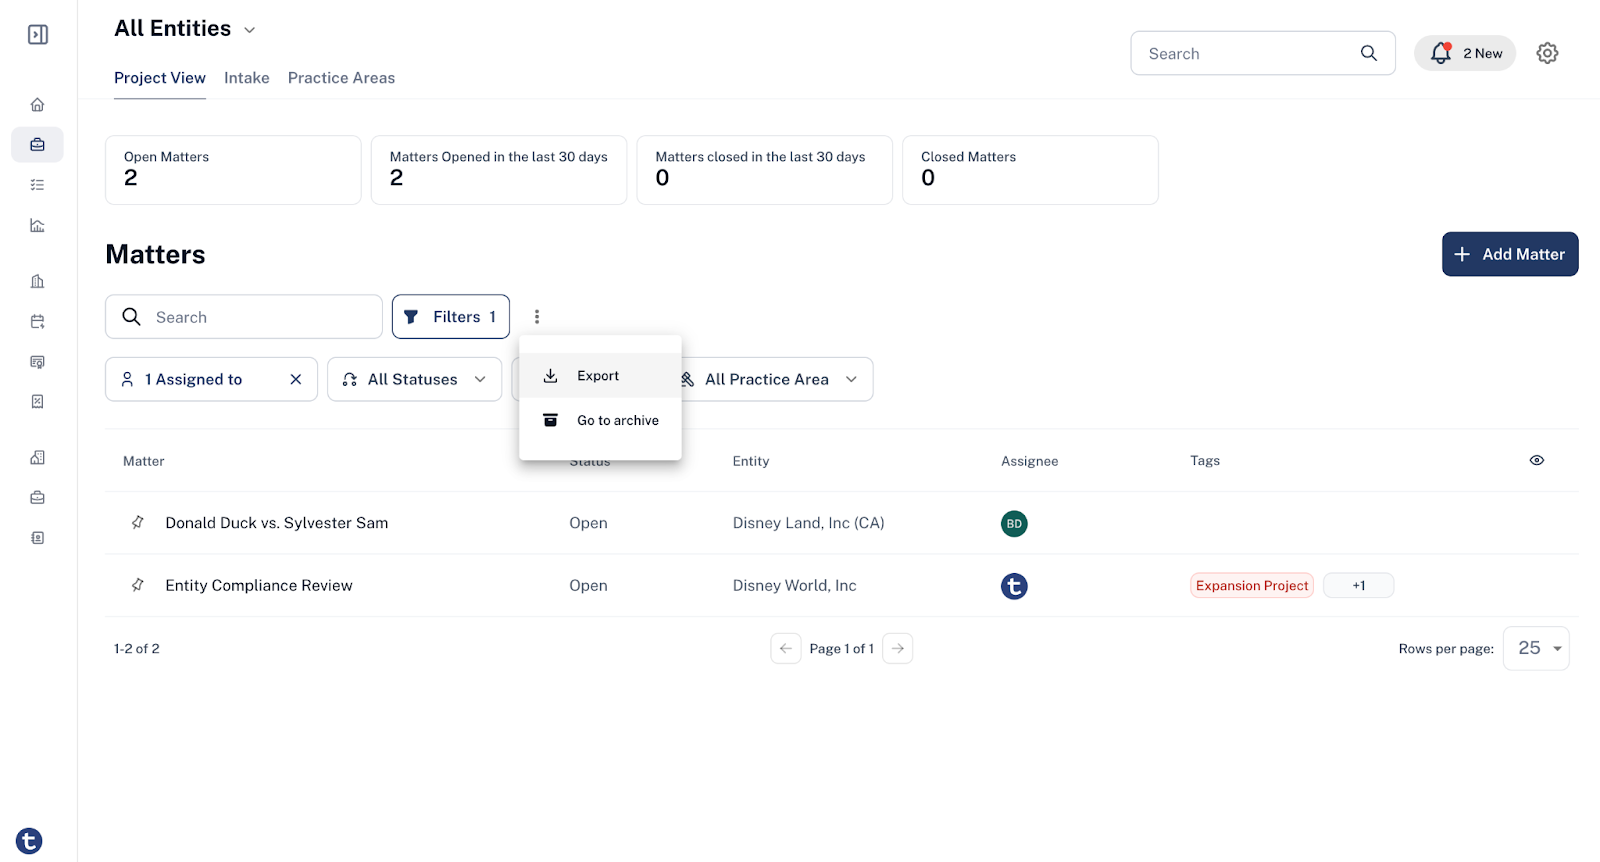
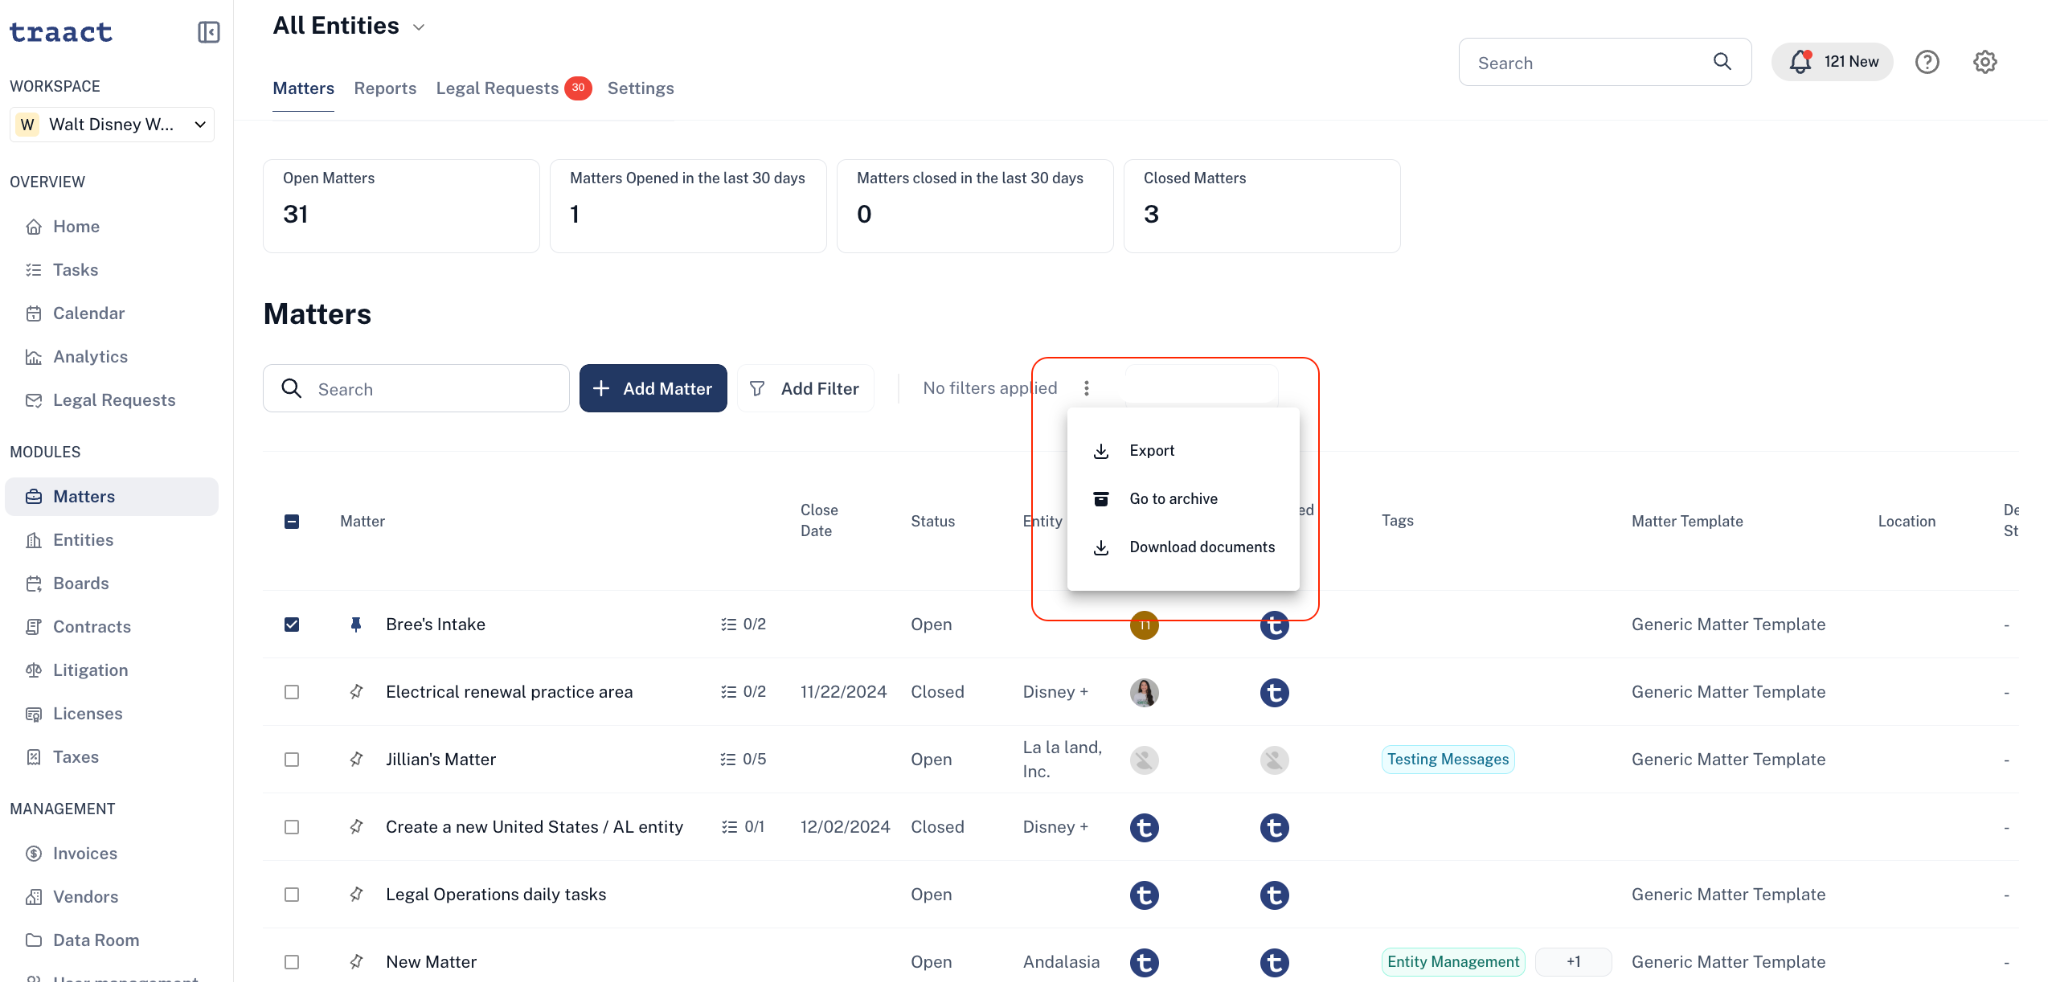
By clicking on the three dots shown in the image below, you can export your matter list in various formats, including Google Sheets, Excel, PDF, or CSV. You can also access your Archived Matters page from this menu.
Entity Filter
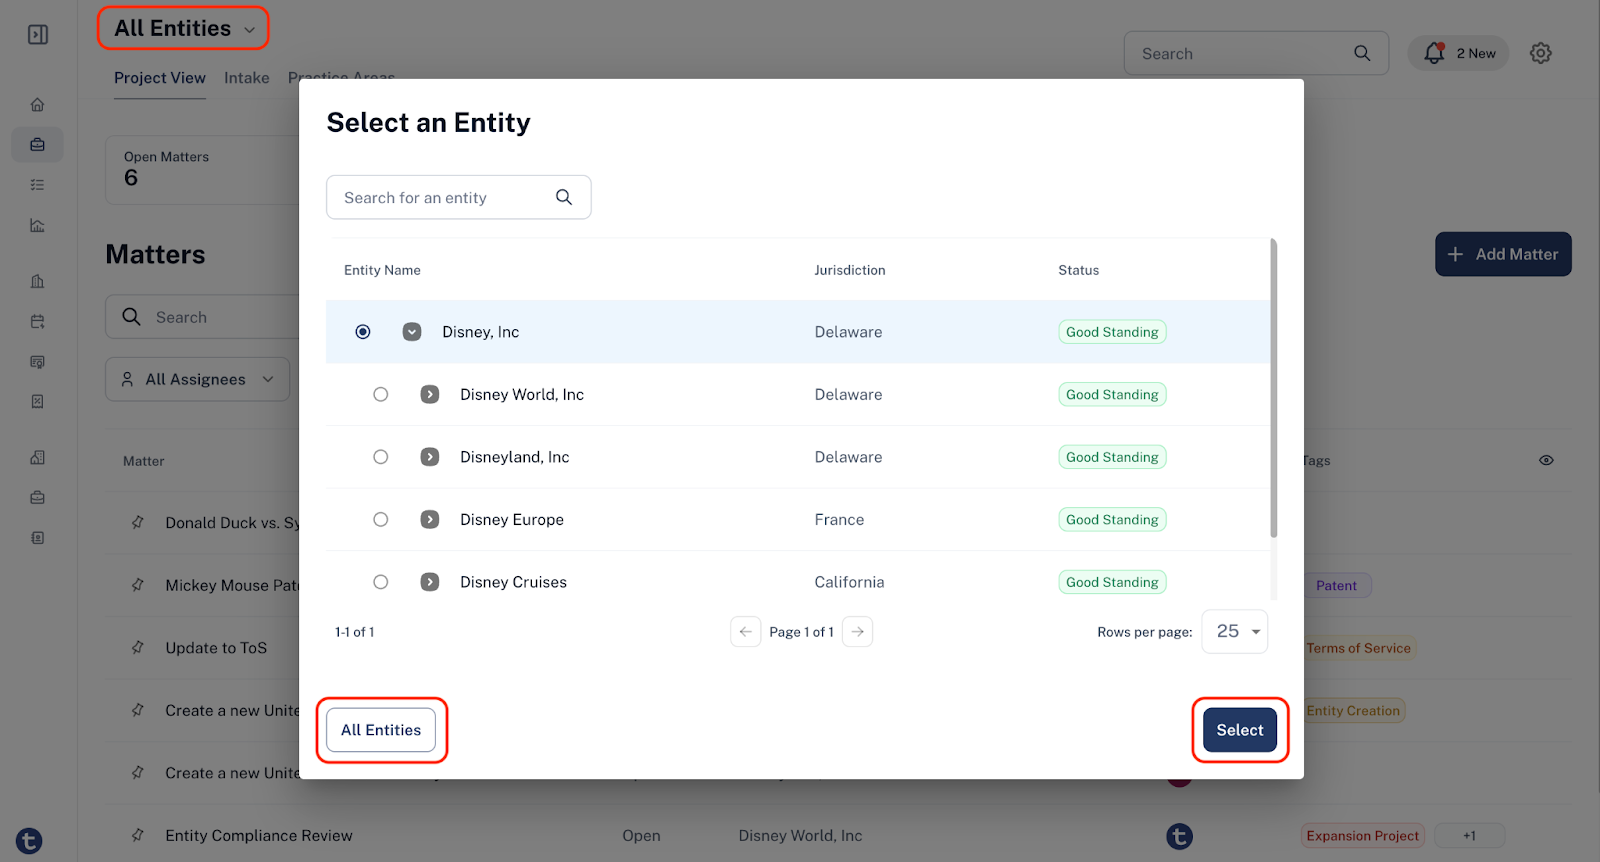
By selecting the option in the top left corner, you can filter your matters based on the entities to which they are linked. For example, click on the desired entity and then click "Select" to view only the matters associated with that entity. If you prefer to see matters for all your entities, choose "All Entities" in the bottom left of the Entity Selector window.
Filtering Matters
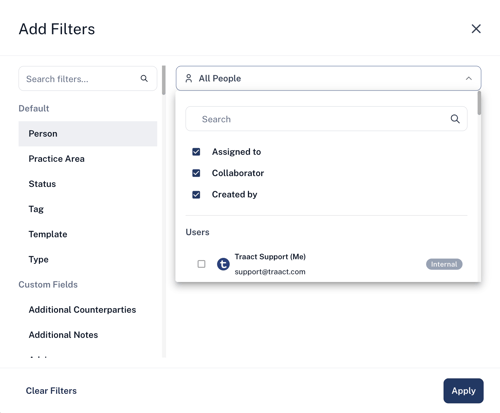
When it comes to Assignees and Collaborators, you have three filtering options:
Step 1: To view matters assigned to a specific user, select "Assigned to" and then choose the desired assignees from the user list.
Step 2: To view matters where a user is only a Collaborator, select "Collaborator" and choose the relevant collaborators from the user list.
Step 3: To view matters where a user is either an Assignee or a Collaborator, select both "Assigned to" and "Collaborator," then choose the users you want from the user list.
A) Status Filter
Select the status of the matters you wish to view.
B) Tag Filter
Choose the desired tags associated with the matters.
C) Practice Area Filter
Select the practice areas relevant to the matters.
D) Custom Fields Filter
Search data entry on custom fields related to the matters.
How to Add a Matter
Step 1: Click on "+ Add Matter";
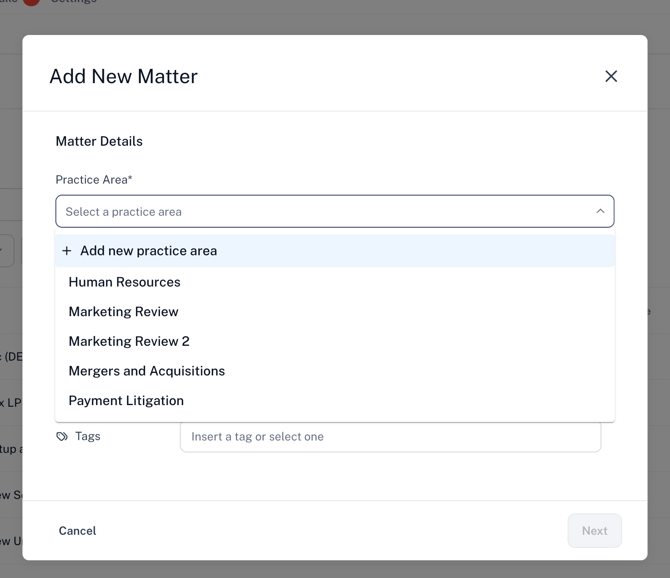
Step 2: Select or add a new Practice Area (please refer to "How to Add a Practice Area" section in this article as needed);
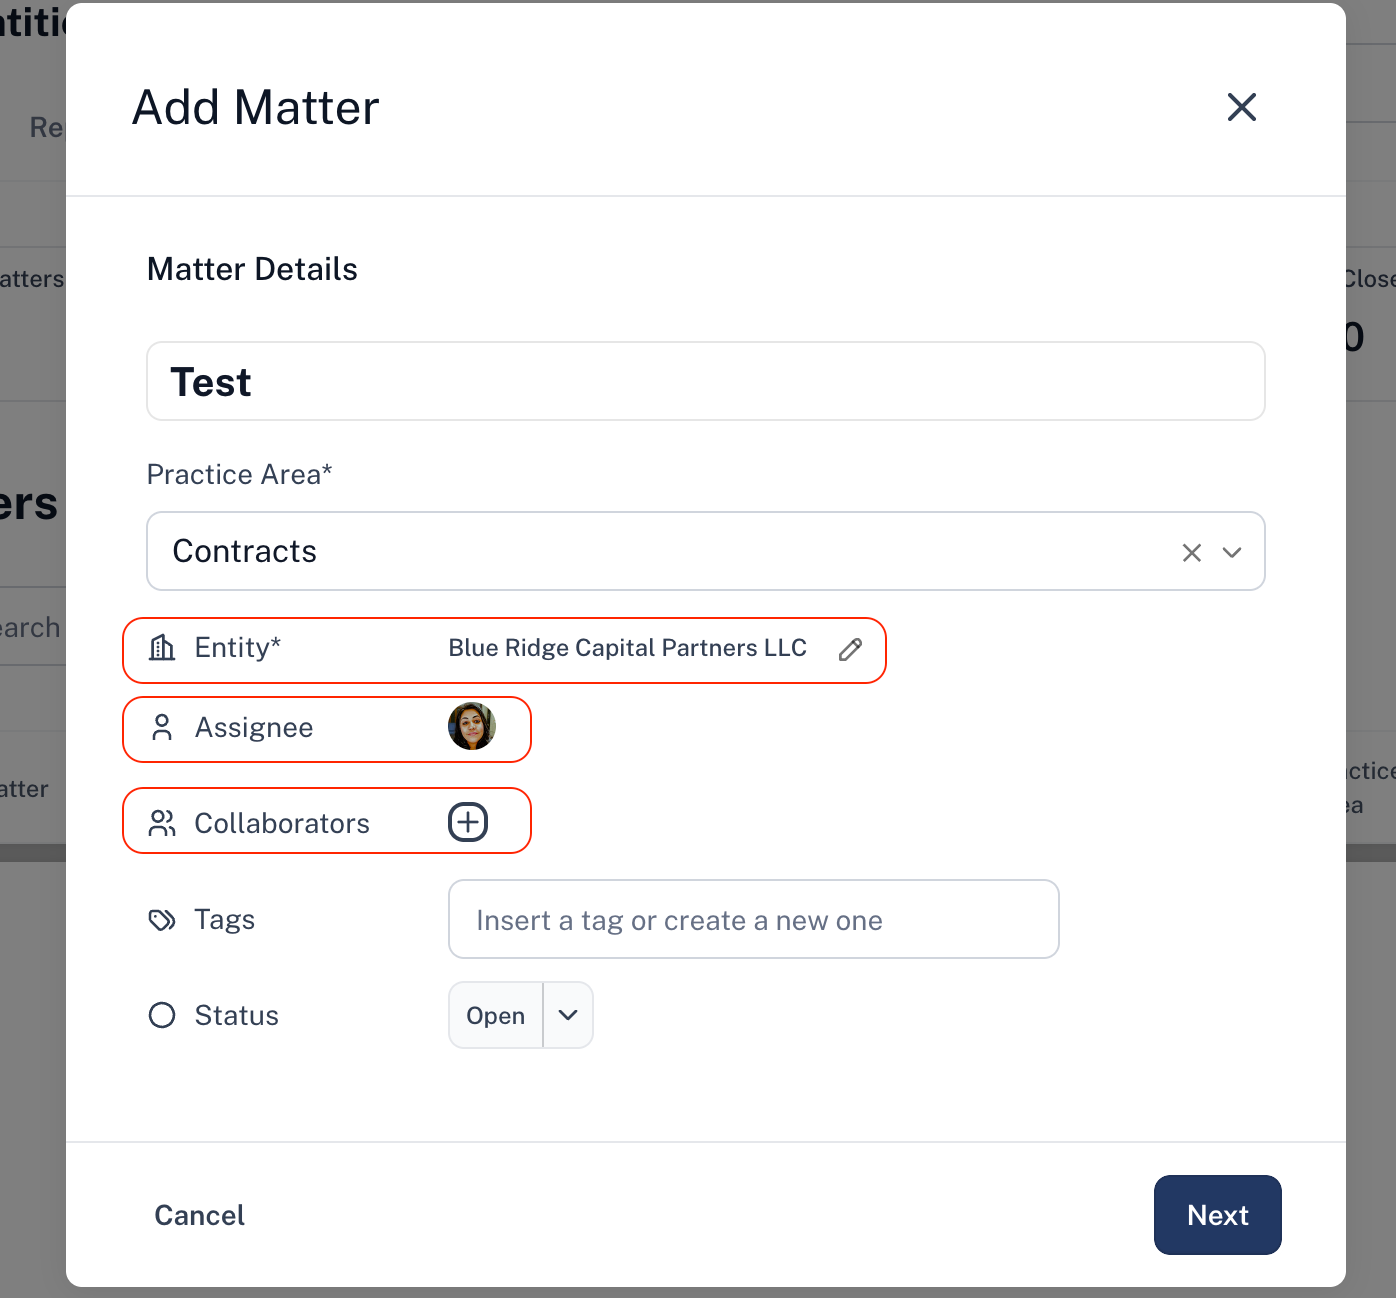
Step 3: Add additional matter details such as title, assignee/collaborators, status, entity and tags;
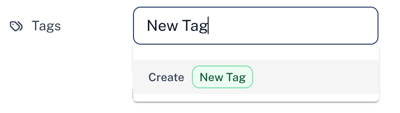
Note: You may either create a new Tag or select a pre-existing one.
-
For a new tag: Enter the word(s) you wish to use as tags. If no existing tag matches your input, the system will prompt you with the option to "Create New."
-
For an existing tag: Begin typing the desired word, and select your preferred tag from the dropdown menu.
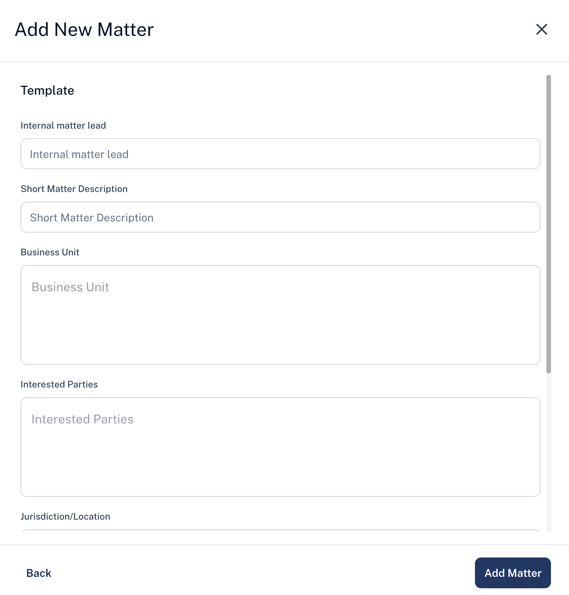
Step 4: When you click "Next,” the system will reveal a matter template based on the Matter Type you selected when creating the Matter. You can then click on "Create Matter” and you will be able to view your Matter full window.
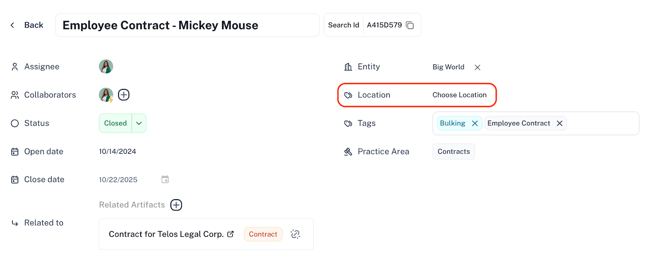
Step 5: In the main matter page, you are able to select a specific location related to that matter.
Note: Make sure you first add a location under the Entity Management Module.
 Step 6: You can then select any artifact that is related to that matter.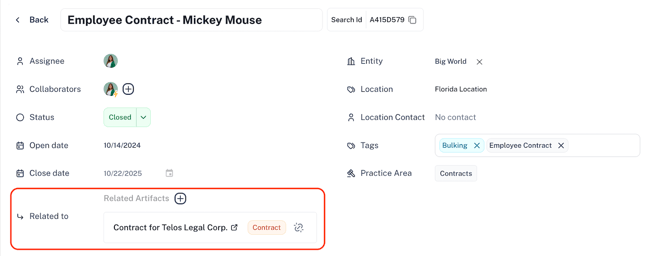
Step 7: Finally, all matters will be displayed on the Matters page. Filters are also available to help streamline your reach search.
Matter Customization & Management
Adding a Practice Area Outside of the Matter Workflow
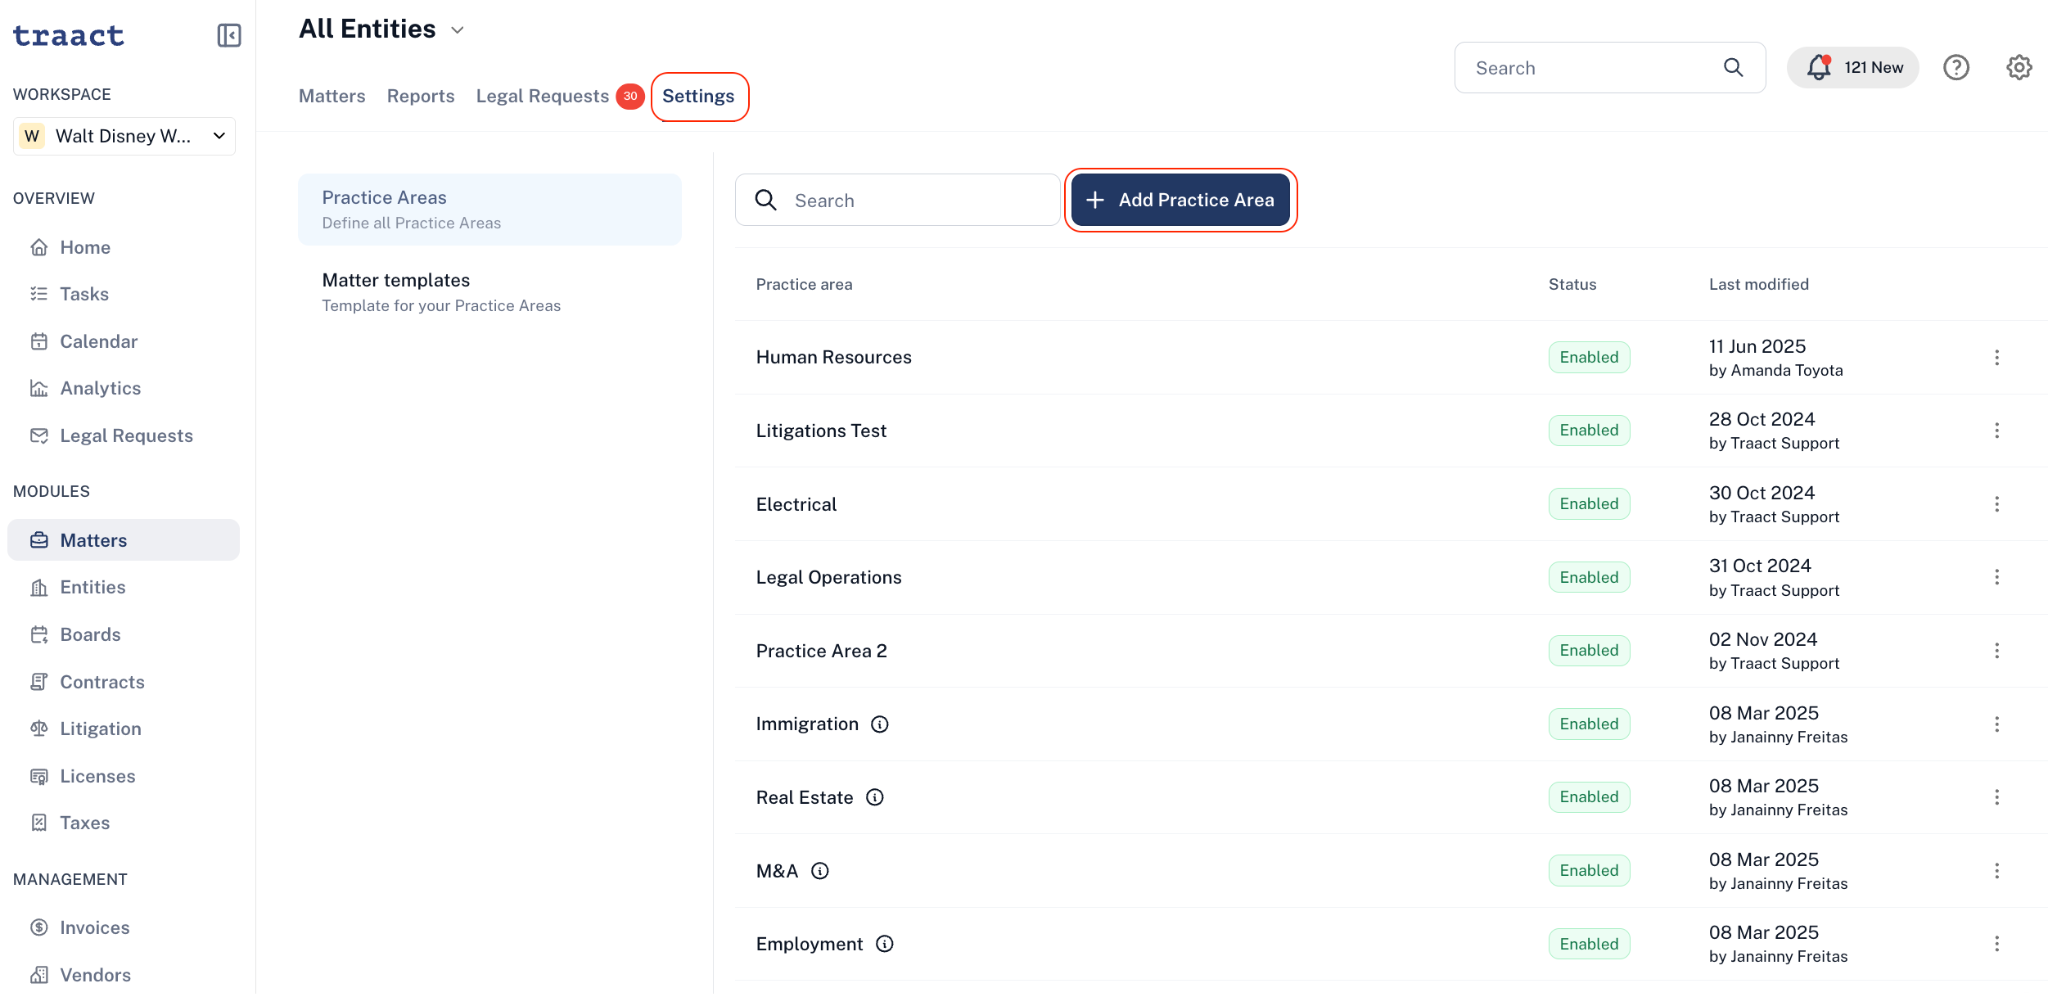
Step 1: In your Matters Module, select "Settings" > "Practice Area" >"+ Add Practice Area"
Step 2: You may then add a Practice Area Name, as well as a Descriptio, and click "Save";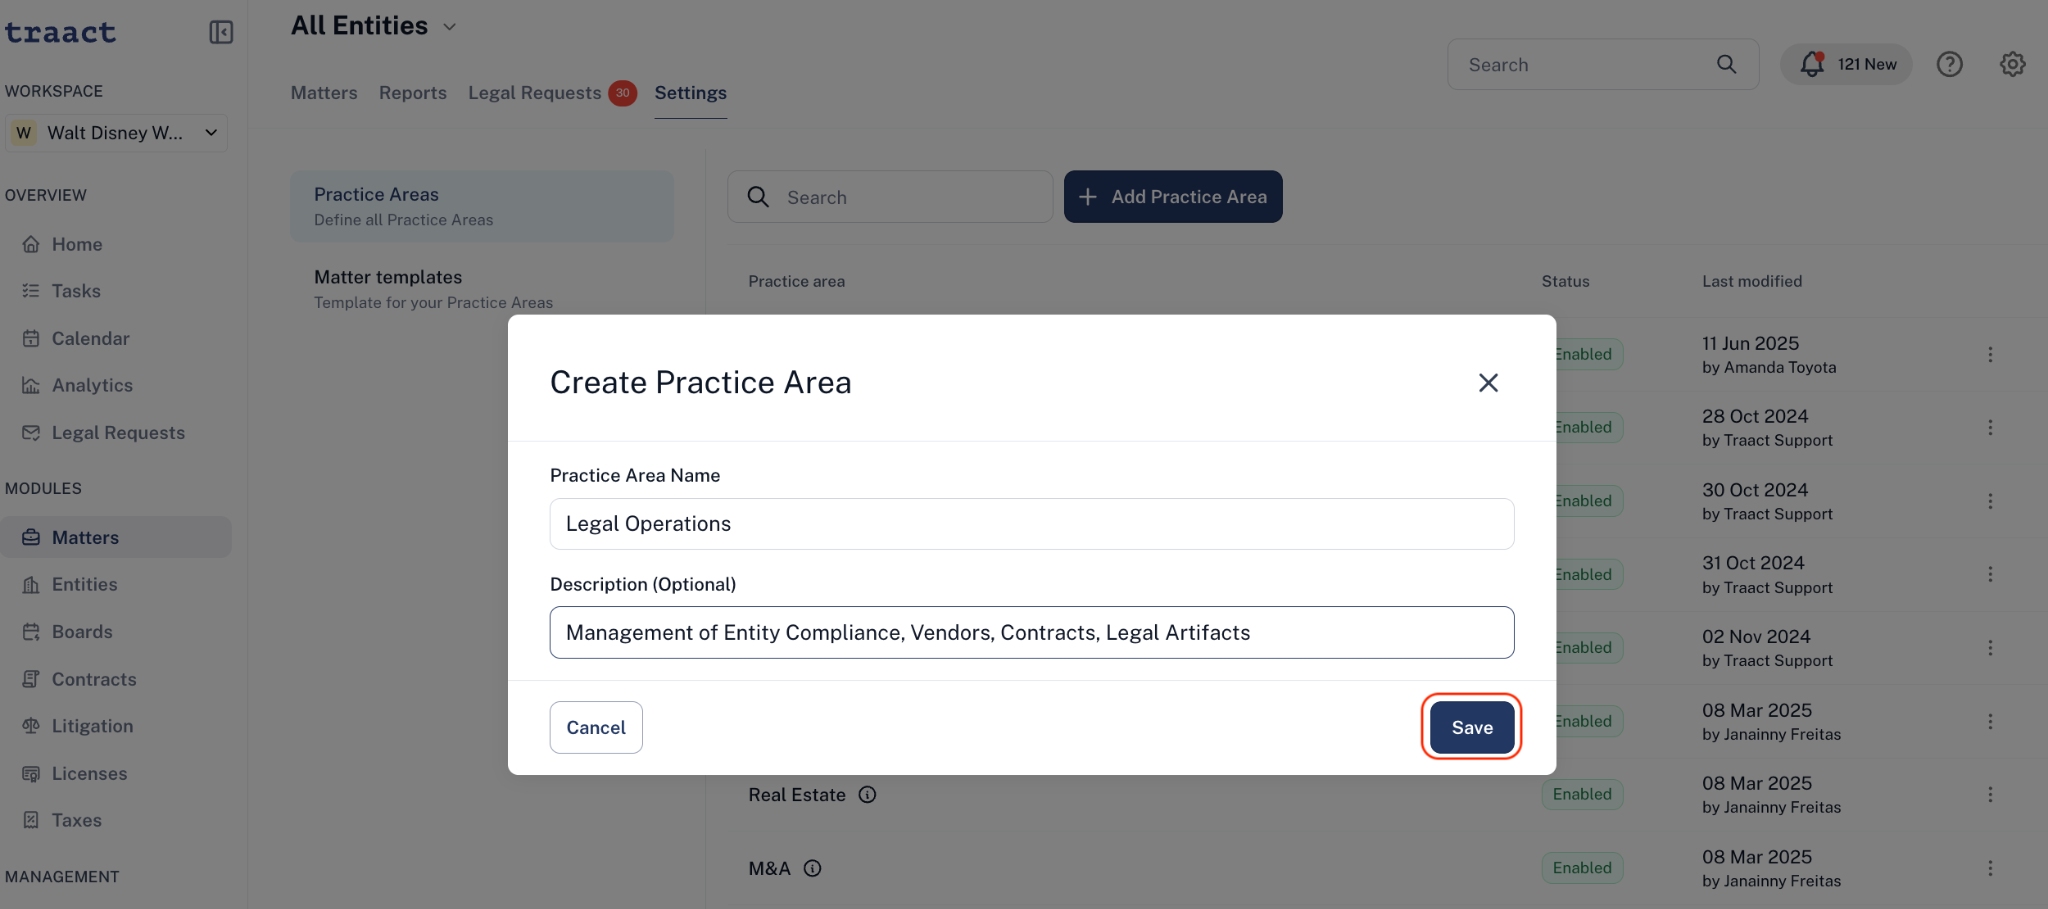
Adding a Practice Area in the Matter Workflow
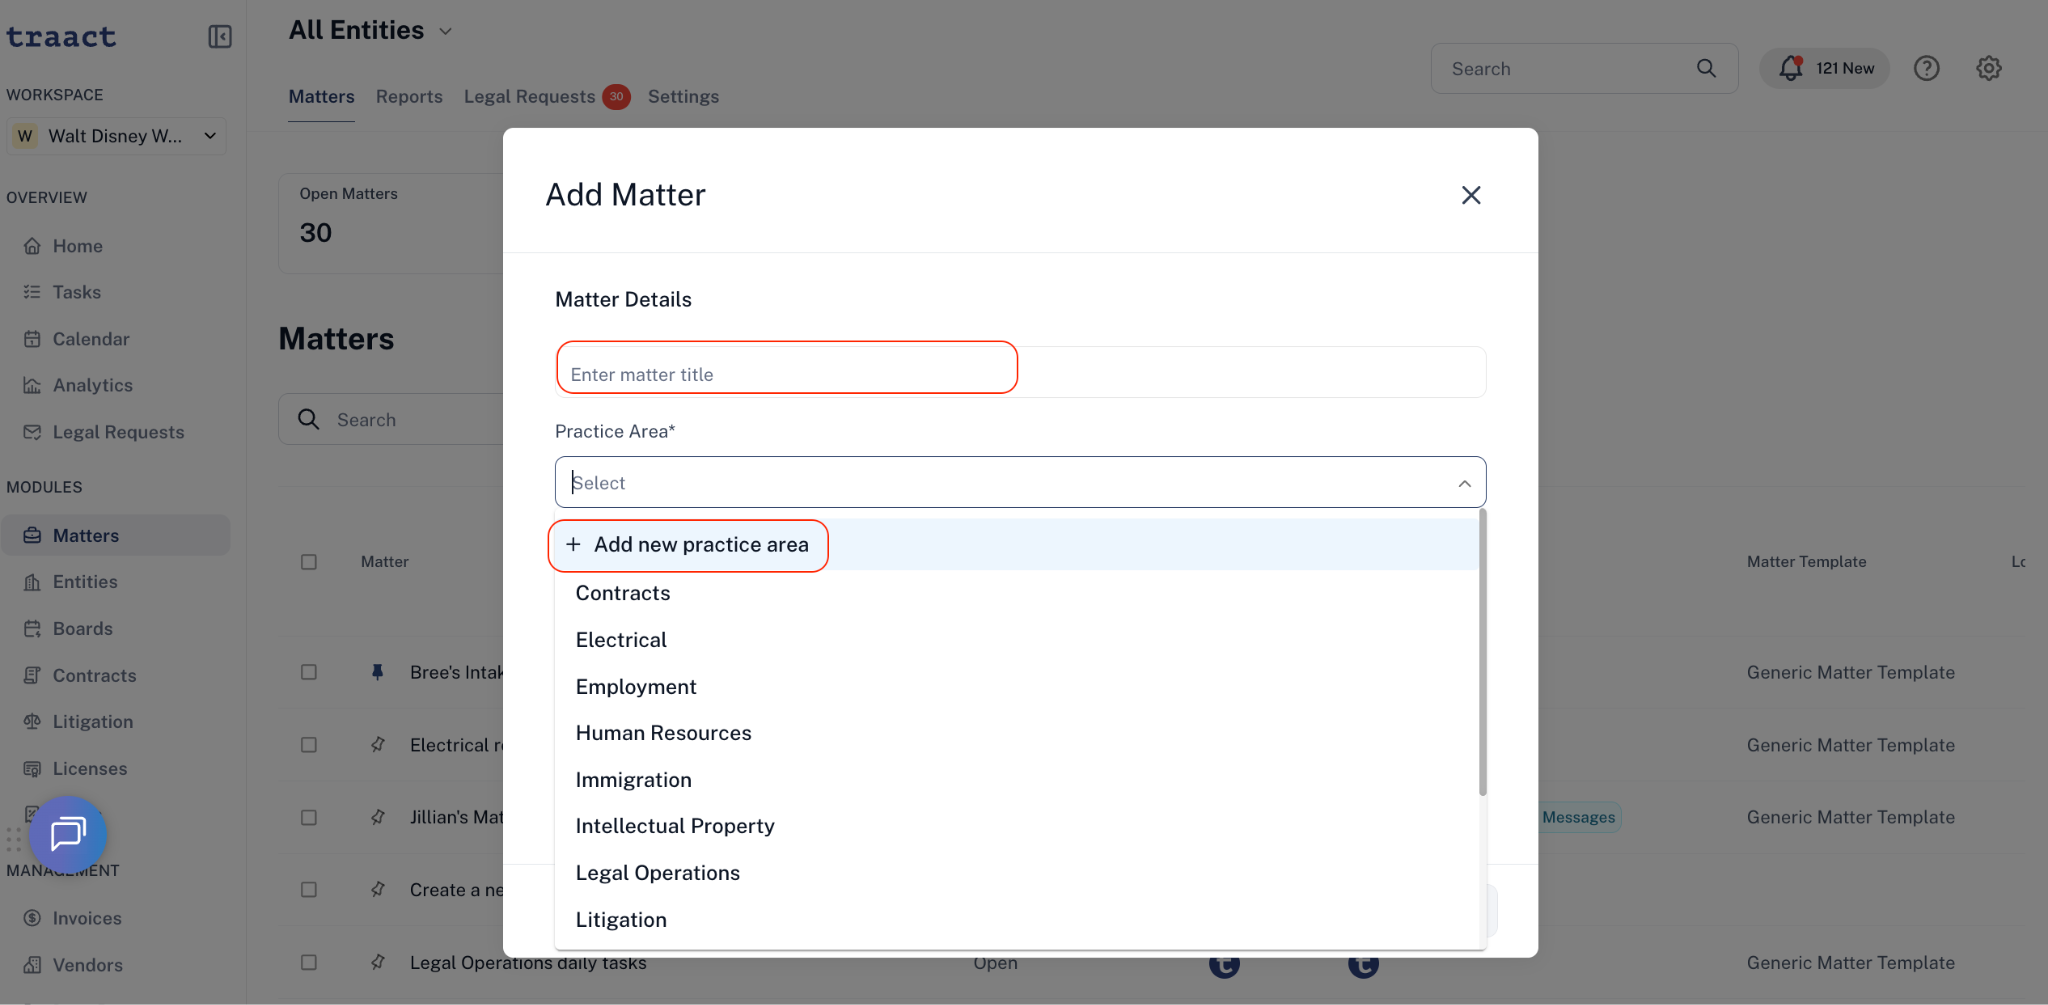
Step 1: After clicking on "+ Add Matter" you may select the option "+ Add new practice area";
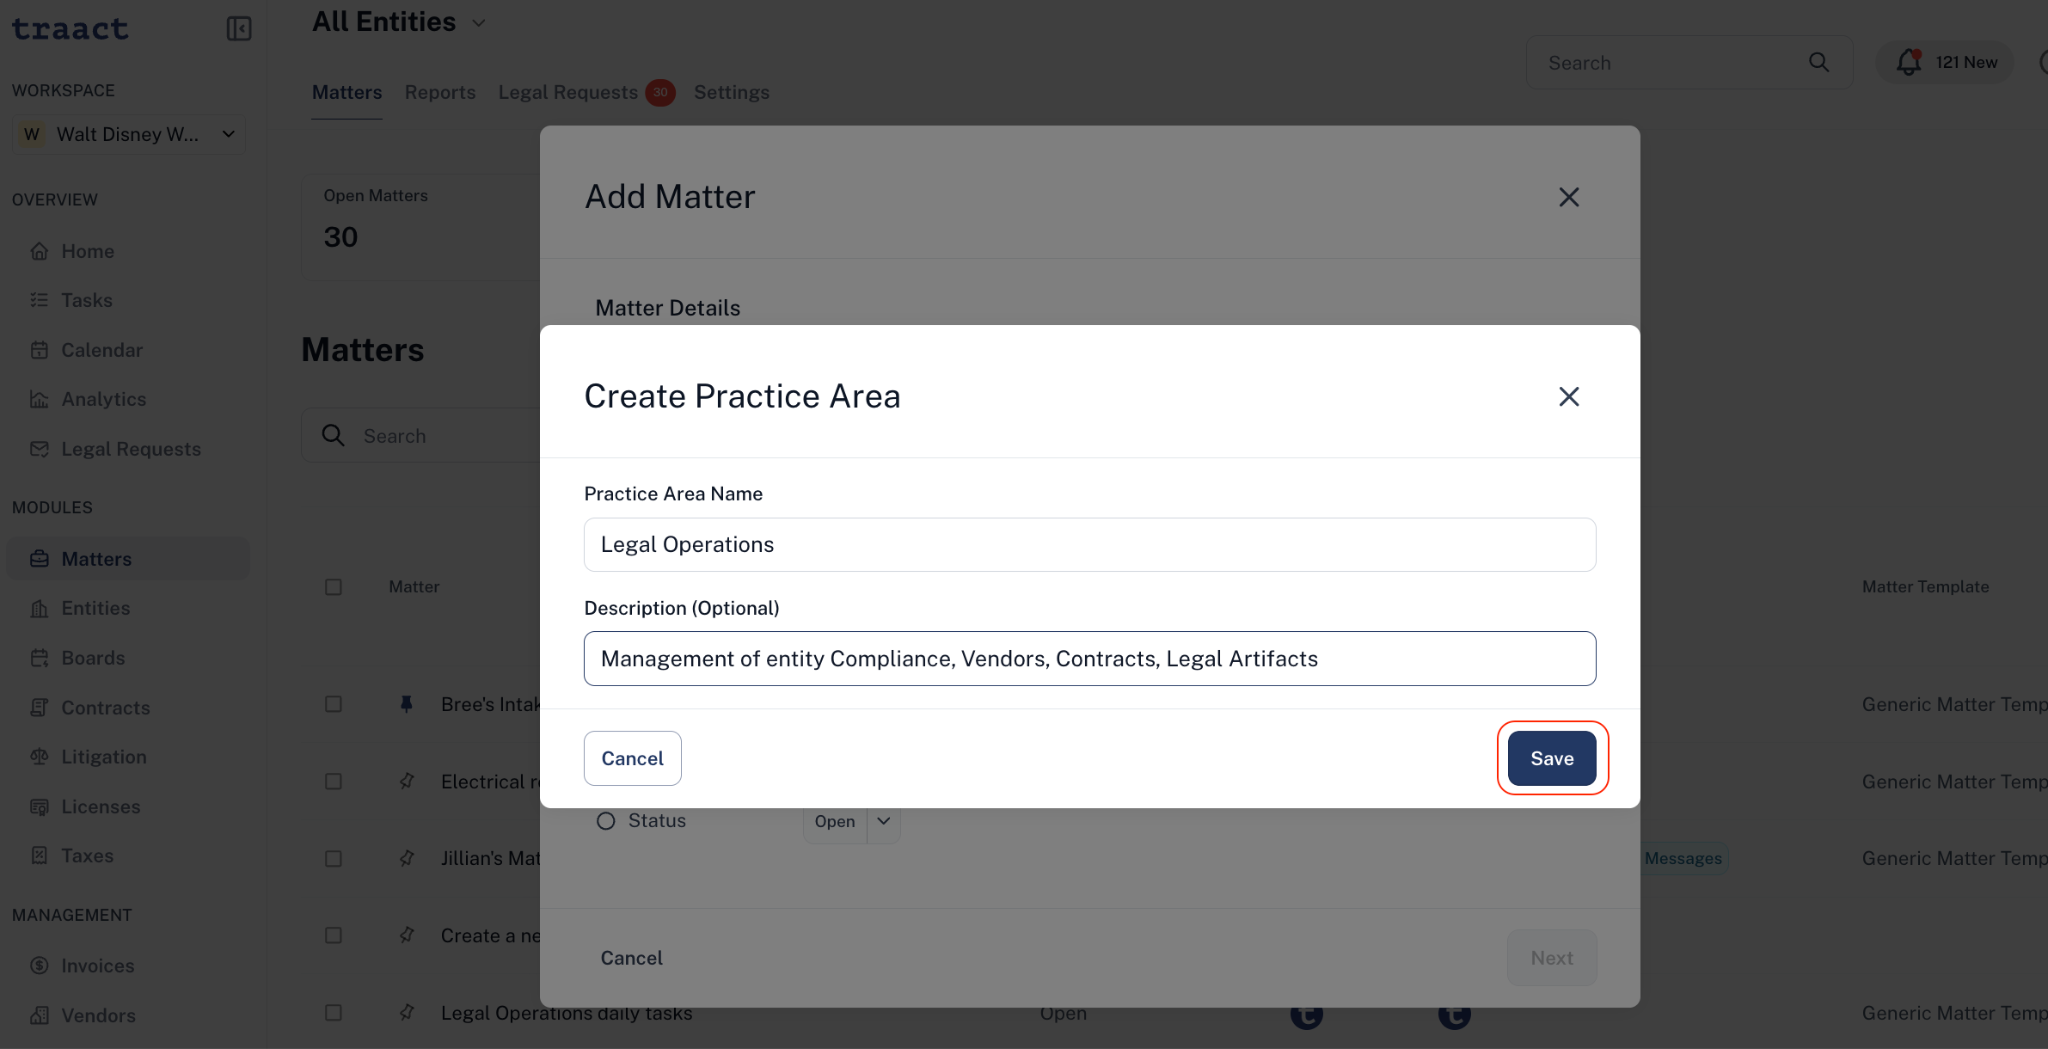
Step 2: You may then add a Practice Area Name, as well as a Description, and click on "Save". This will provide a generic Matters template to use to manage the data.
Customizable Matter Templates
You can create your own Matter Templates from scratch or use and modify the available pre-made templates to meet your specific needs.
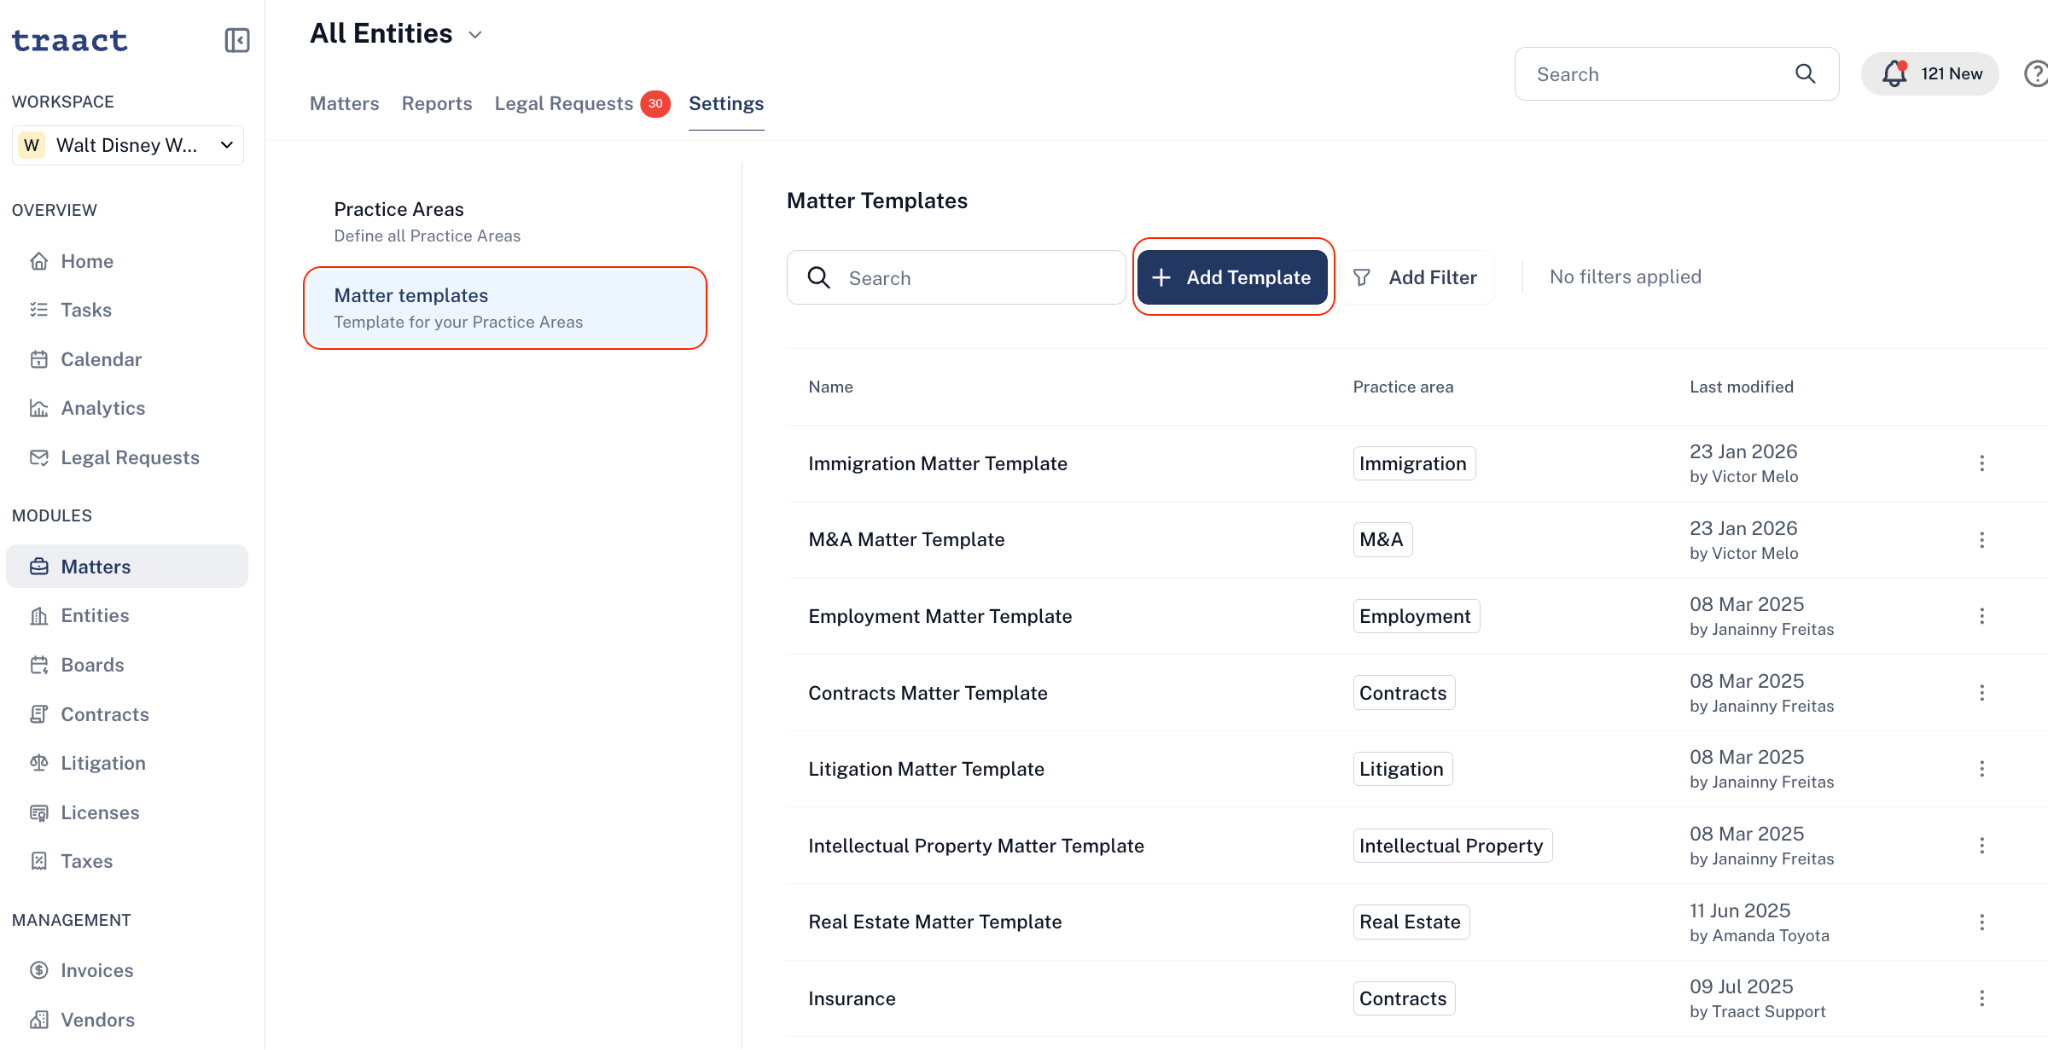
Add a New Matter Template
Step 1: Select "+ Add Template"
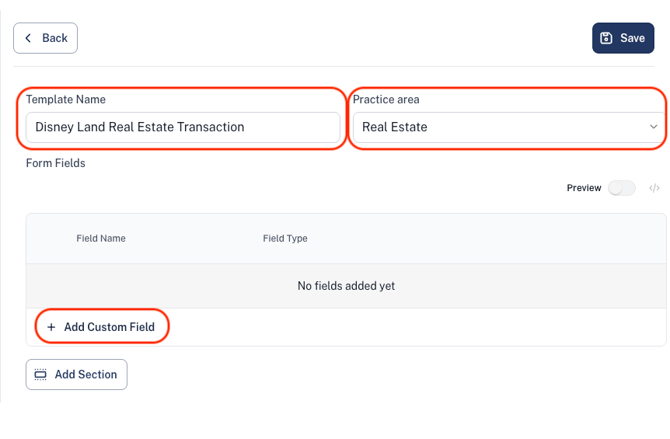
Step 2: Enter a Template Name and select a Practice Area
Step 3: Select"+ Add Custom Field"
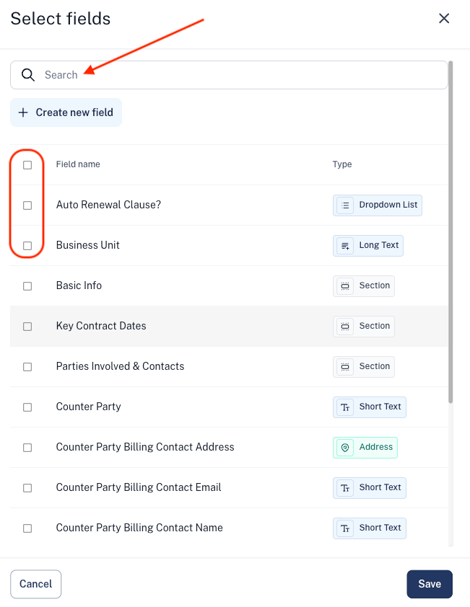
Step 4: Select one or multiple fields or search for a specific field to enter into the template.
Step 5: If needed, create a new custom field by clicking "+ Create new field" and selecting the type of field you would like to add from the drop-down list.
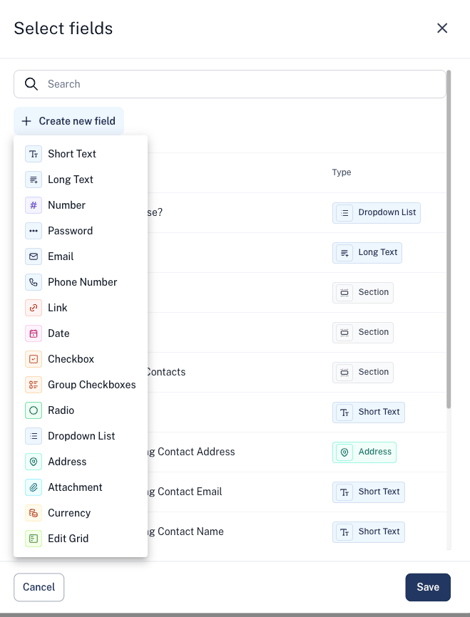
Step 6: Enter the Field Name. Please note that further customization of Placeholder text, making it as required, or adding a default value, description, or tooltips is optional.
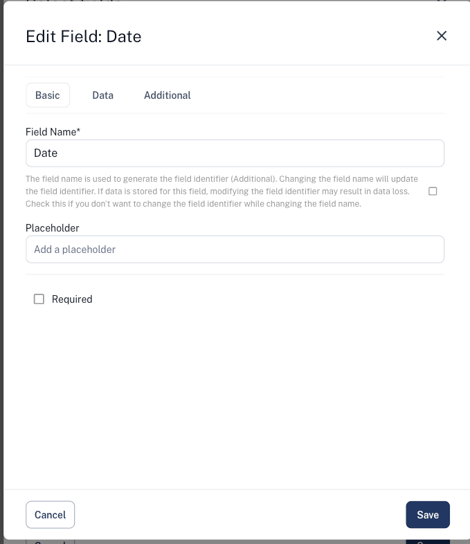
Step 7: If you'd like to add Sections to your template, select "Add Section", enter the Section Name, and click save.
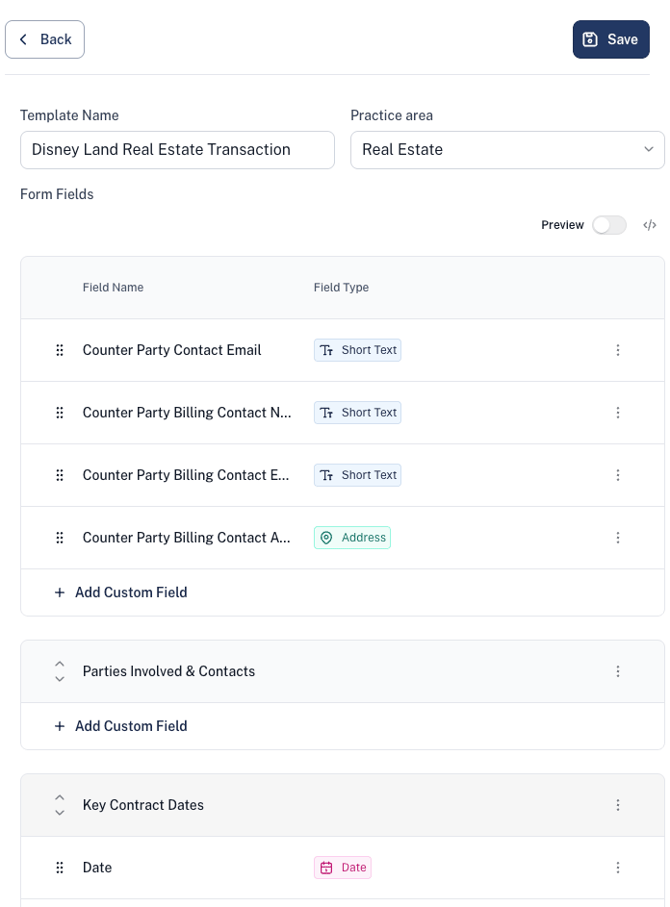
Step 8: Select "Save" to save the Matter Template
Edit an Existing Matter Template
Step 1: Click the three dots to the right of the Matter Template you'd like to edit and select "Edit".
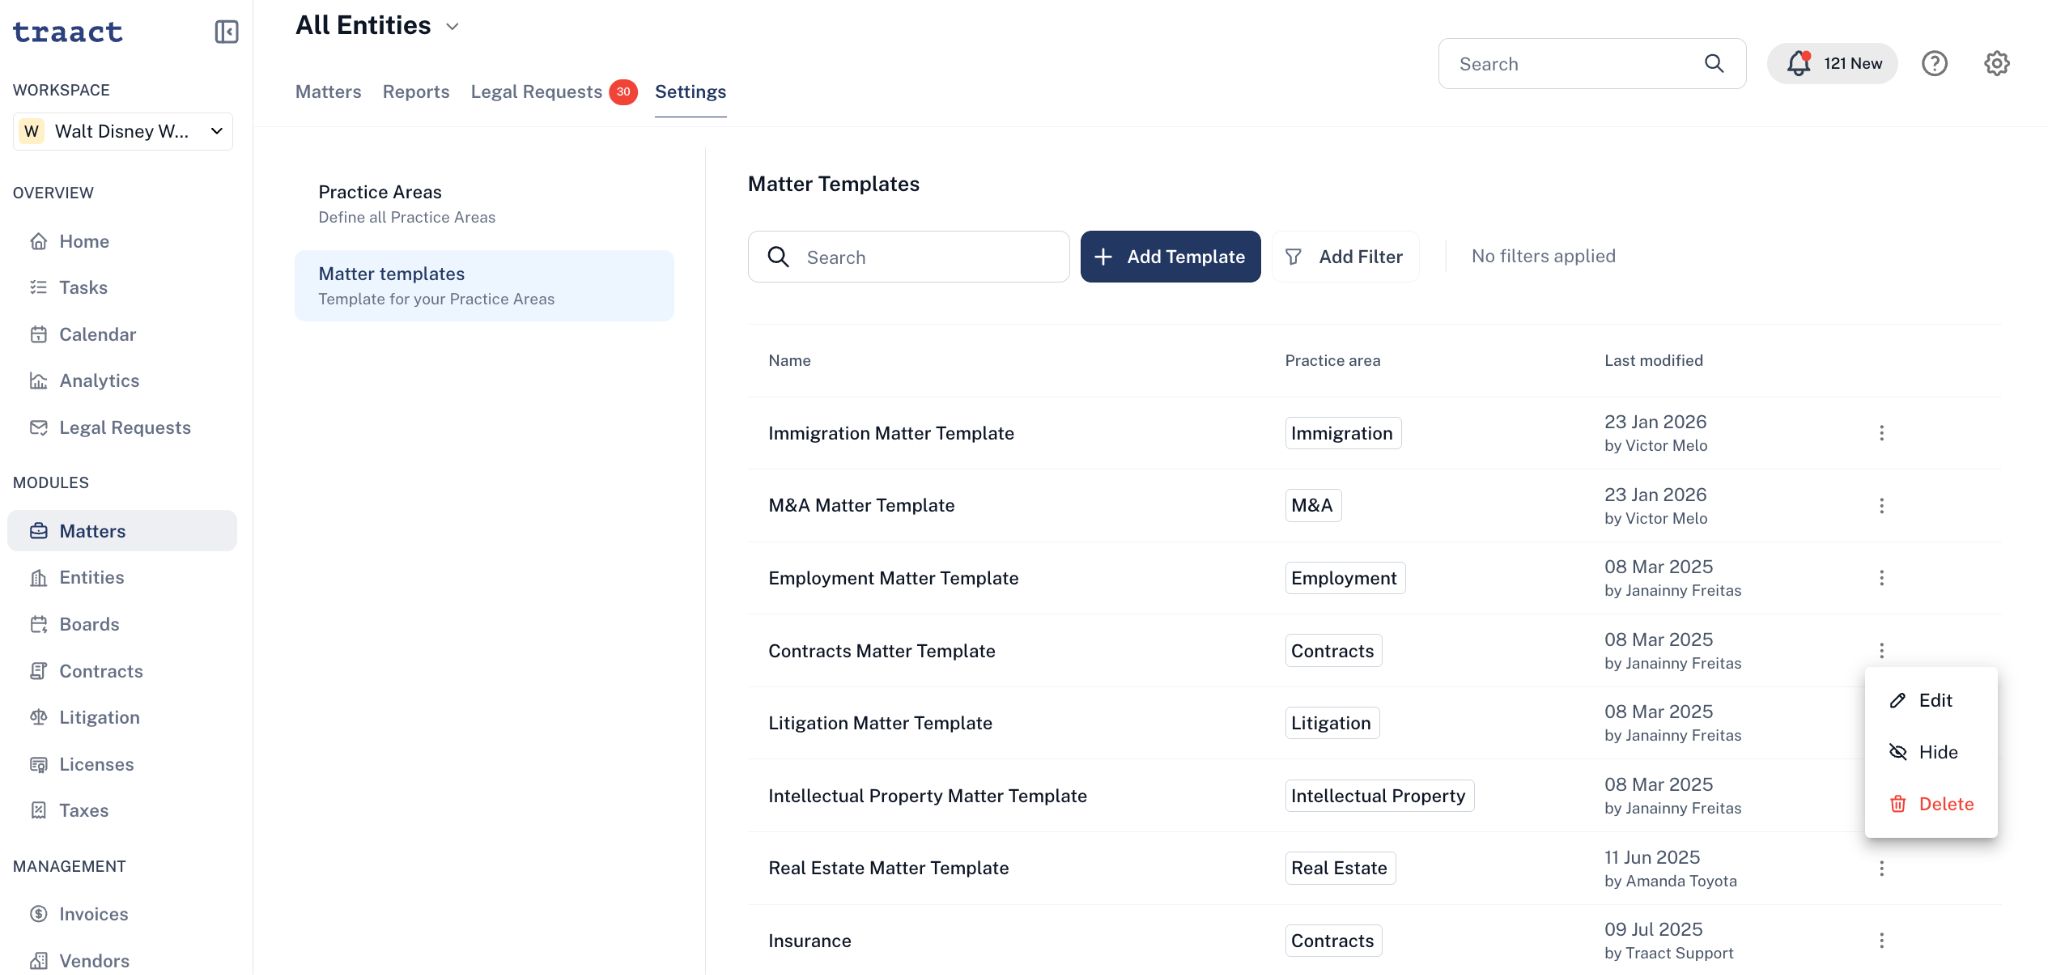
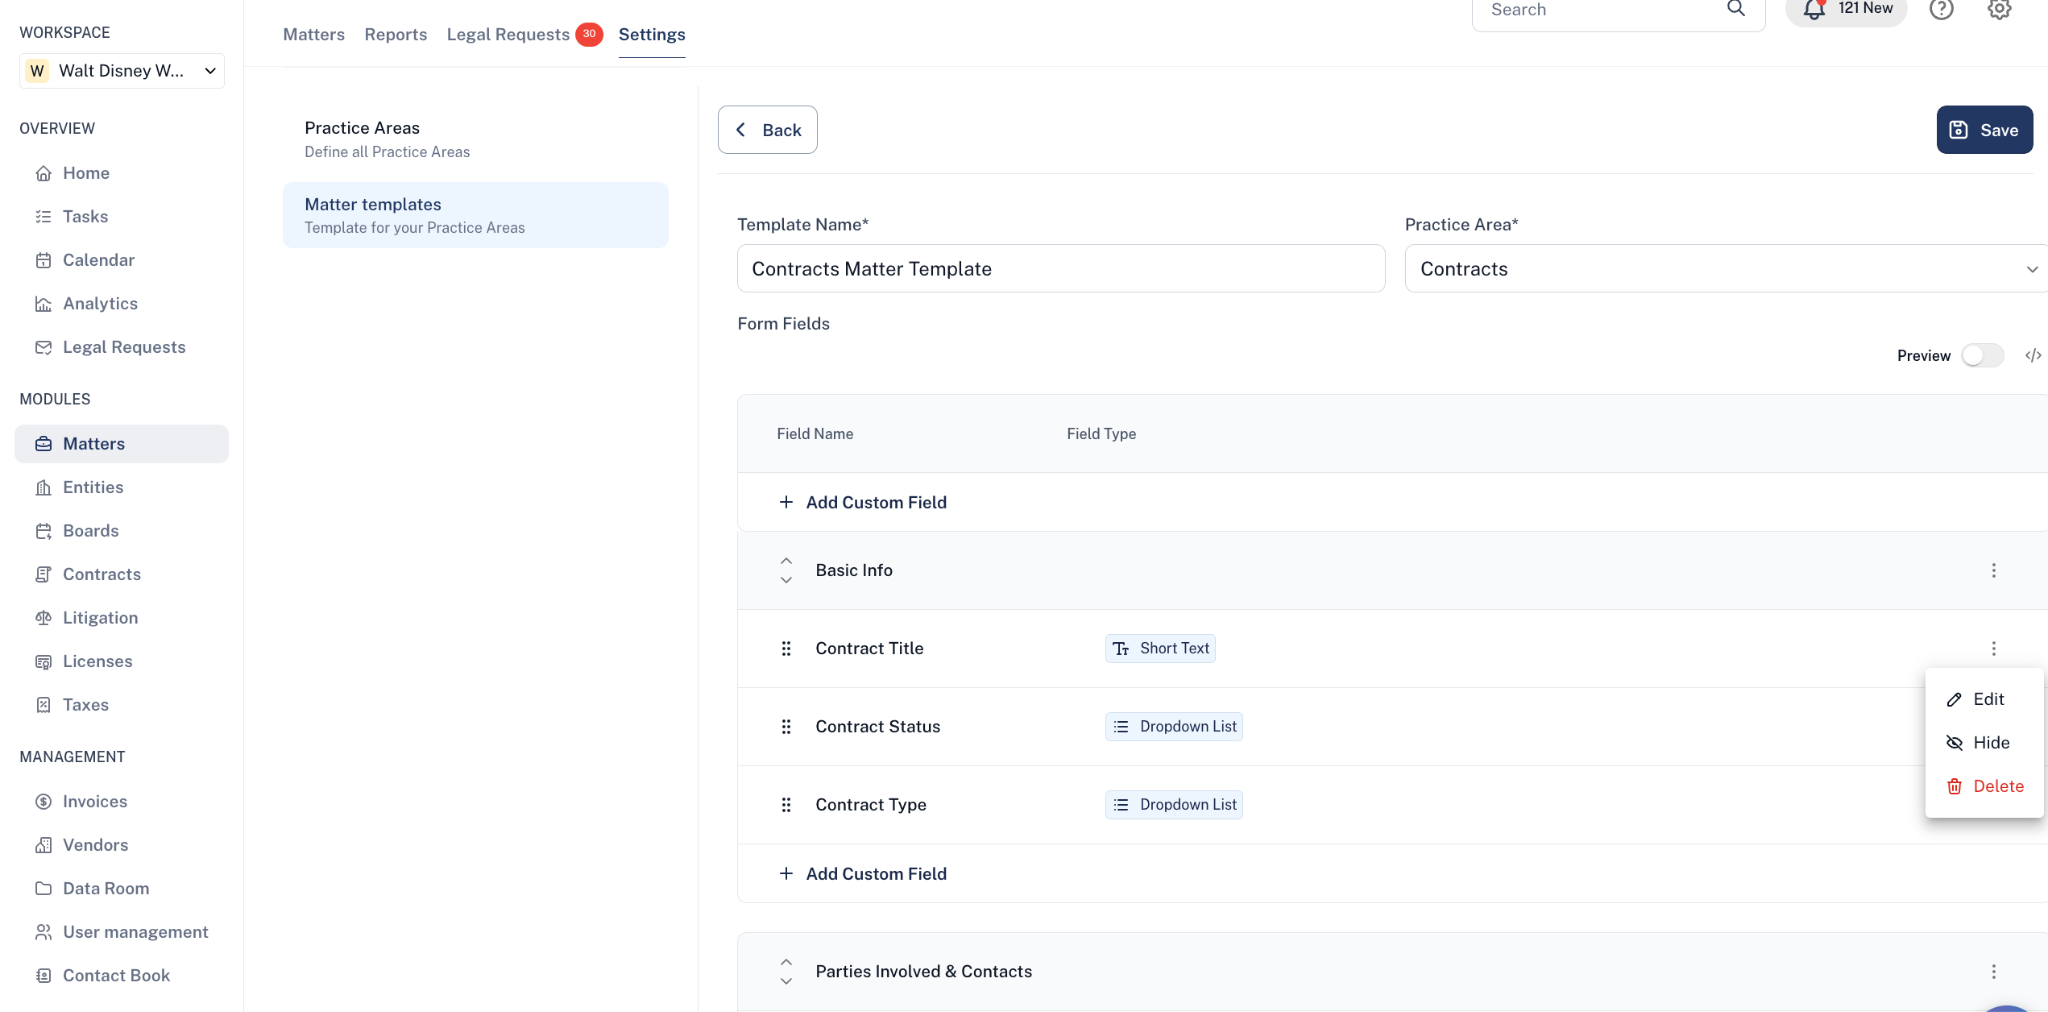
Step 2: From here, you can:
-
Edit the Template Name and Practice Area
-
Add fields within the existing sections
-
Add sections
-
Drag and drop fields from one section to another
-
Edit the existing field names and details
-
Edit section names
-
Hide fields
-
Hide sections
Tasks
Once your matter is created, you have the ability to either add individual Tasks, apply an existing task workflow, or create a new task workflow.
The Task details follow a similar structure to the matters’ details; however, tasks have the following Status options:
-
To Do
-
Pending
-
In Progress
-
Done
To create an individual task, click on “+ Add Task” in the Tasks tab within the Matter.
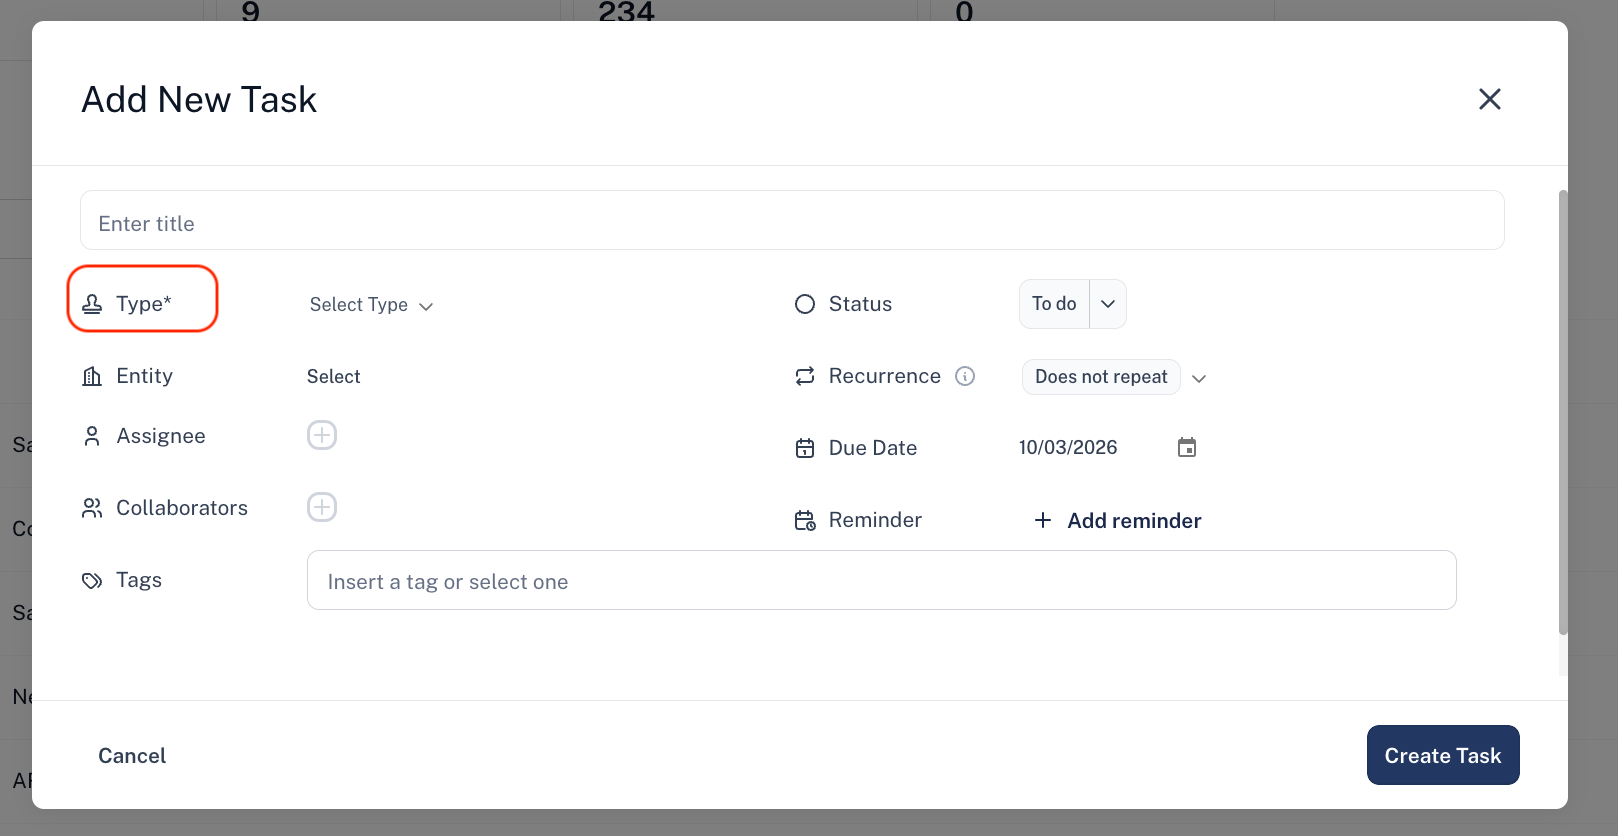
Fill in the desired details and click on "Create."
To create a Task Workflow, click on “+ Create Workflow.” You will be redirected to the page below, where you can personalize your template by giving it a name, selecting a type, adding tasks, and customizing its details as shown below.
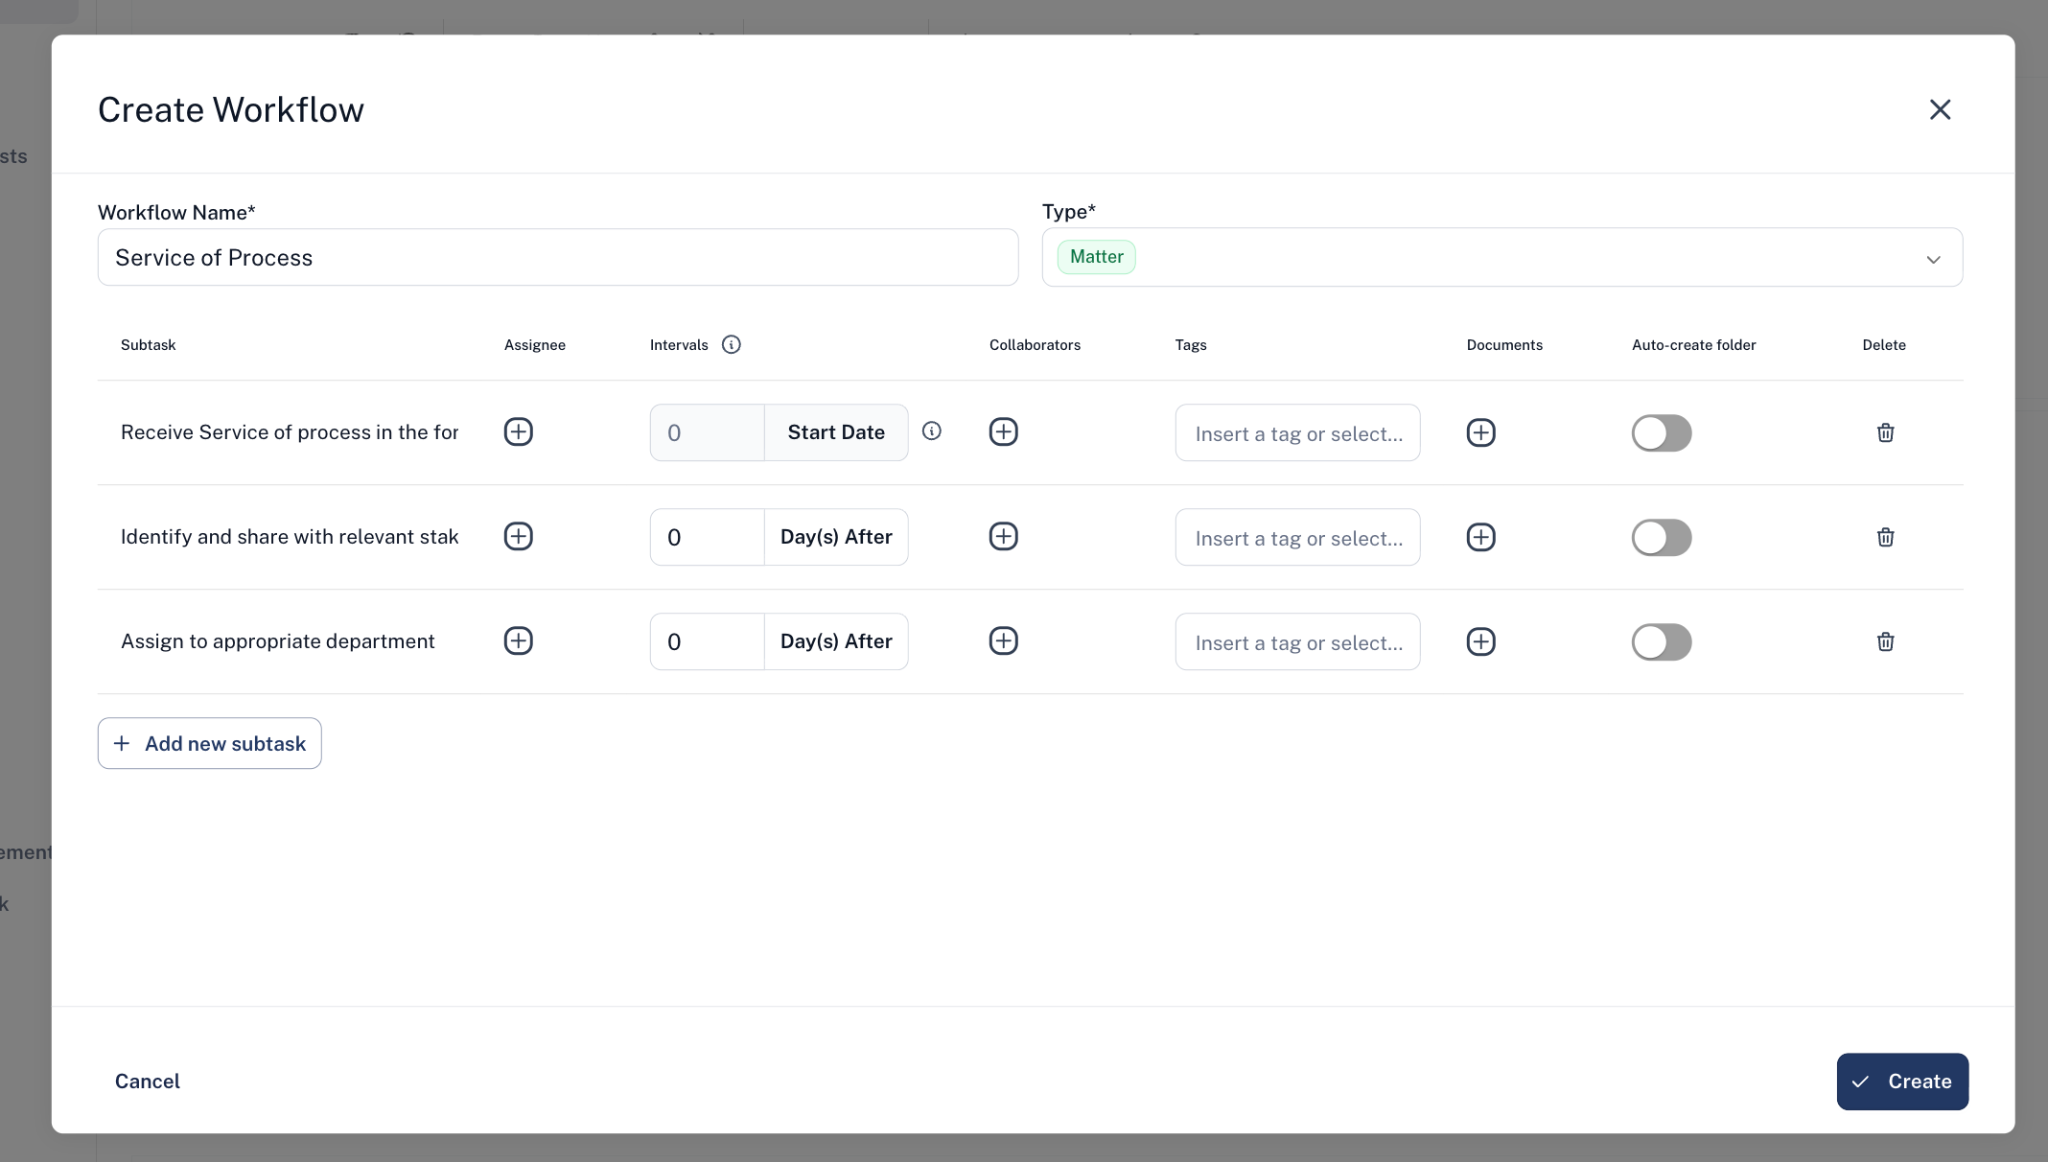
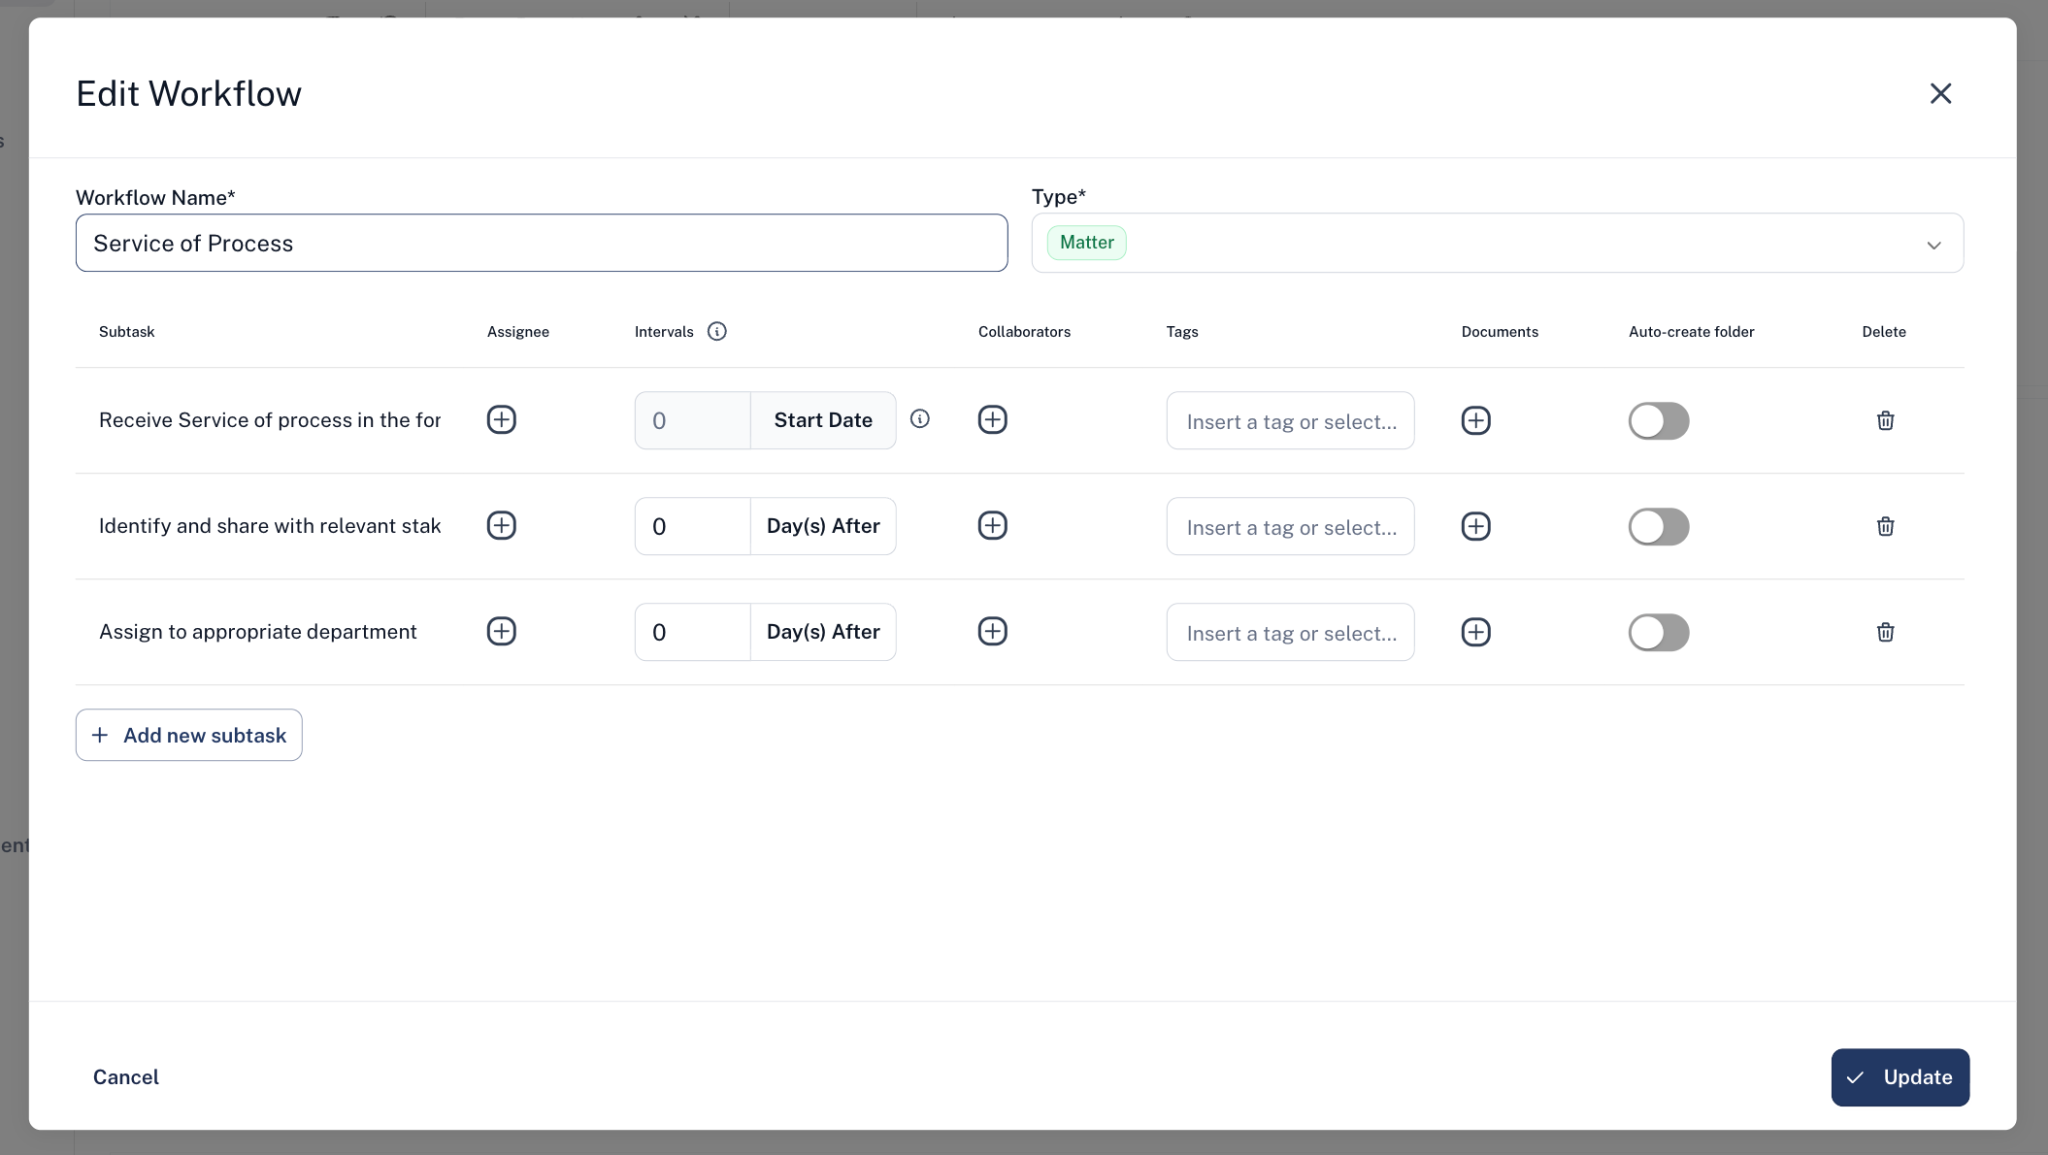
Note that when creating Individual Tasks or Task Workflows, you can choose whether the system should automatically generate folders for each task or subtask.
Activity
The Activity tab displays all actions taken on a matter, from creation to status changes, and also serves as a messaging tool. If you prefer to view only the messages exchanged.
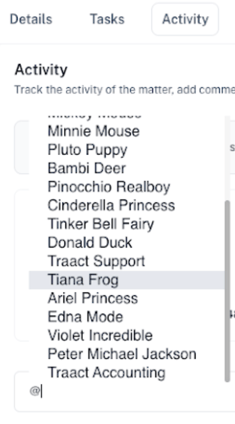
You can also chose who can view the Activity. By choosing Public which for everyone to see or you can choose Private and tag a user in a message, type "@" and select the user from the users list. They will also be notified about being tagged in a message.
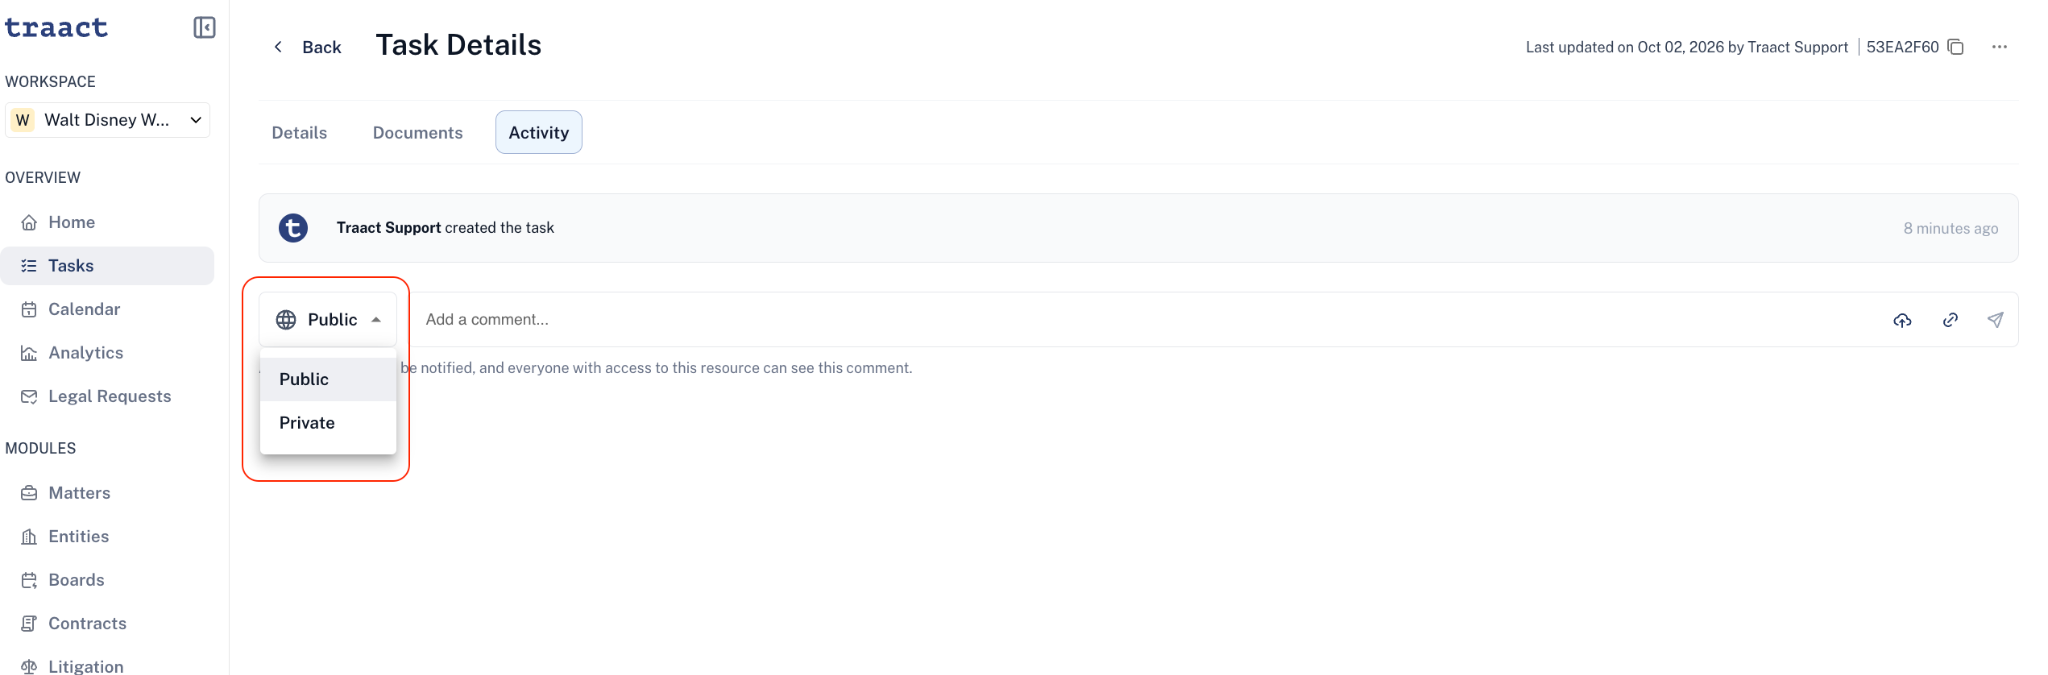
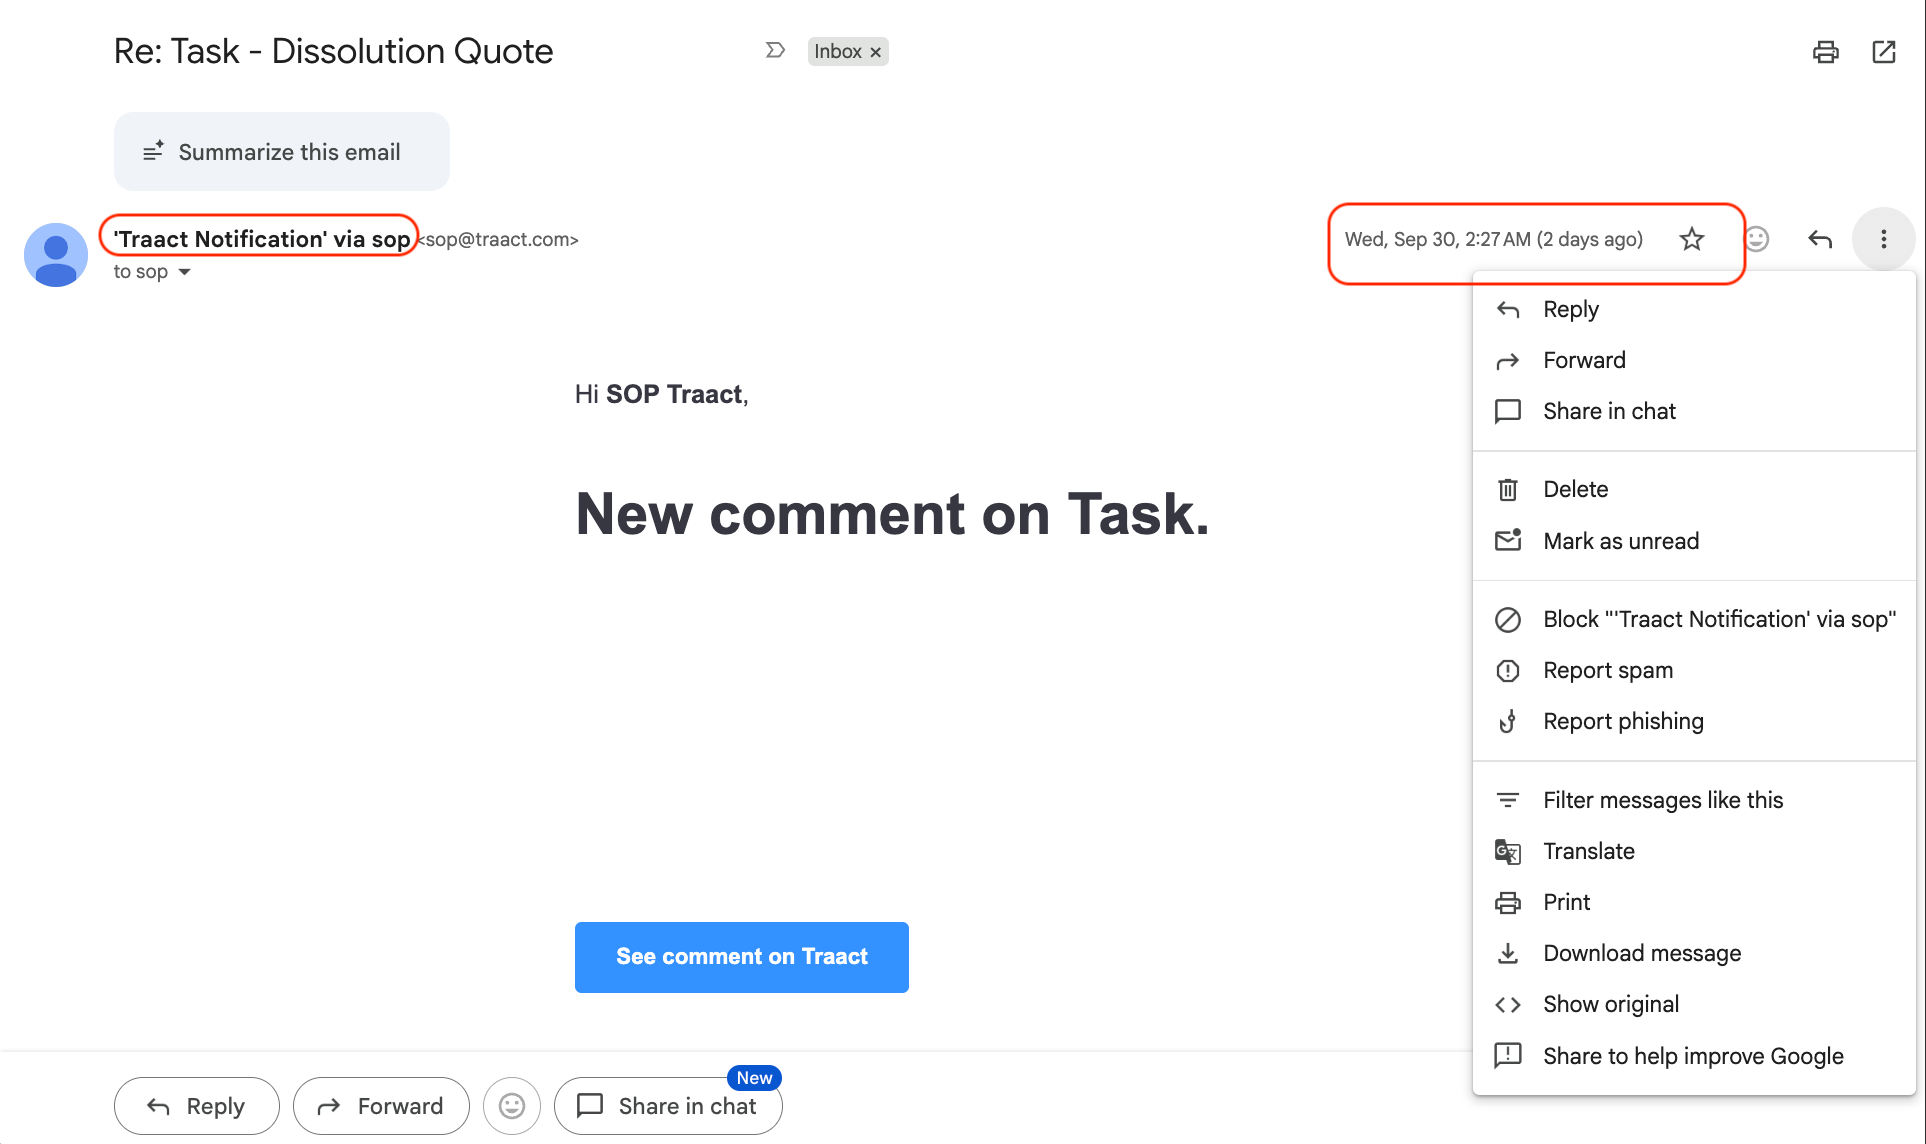
When a message is posted in the Activity tab, an email notification from "Traact Notification" is automatically sent to all assignees and collaborators tagged in the relevant artifact, task, or matter.
To respond, you can simply reply to the email notification, and your response will be recorded directly in the Activity tab within Traact. Alternatively, you have the option to reply directly within the Activity tab if preferred.
Documents
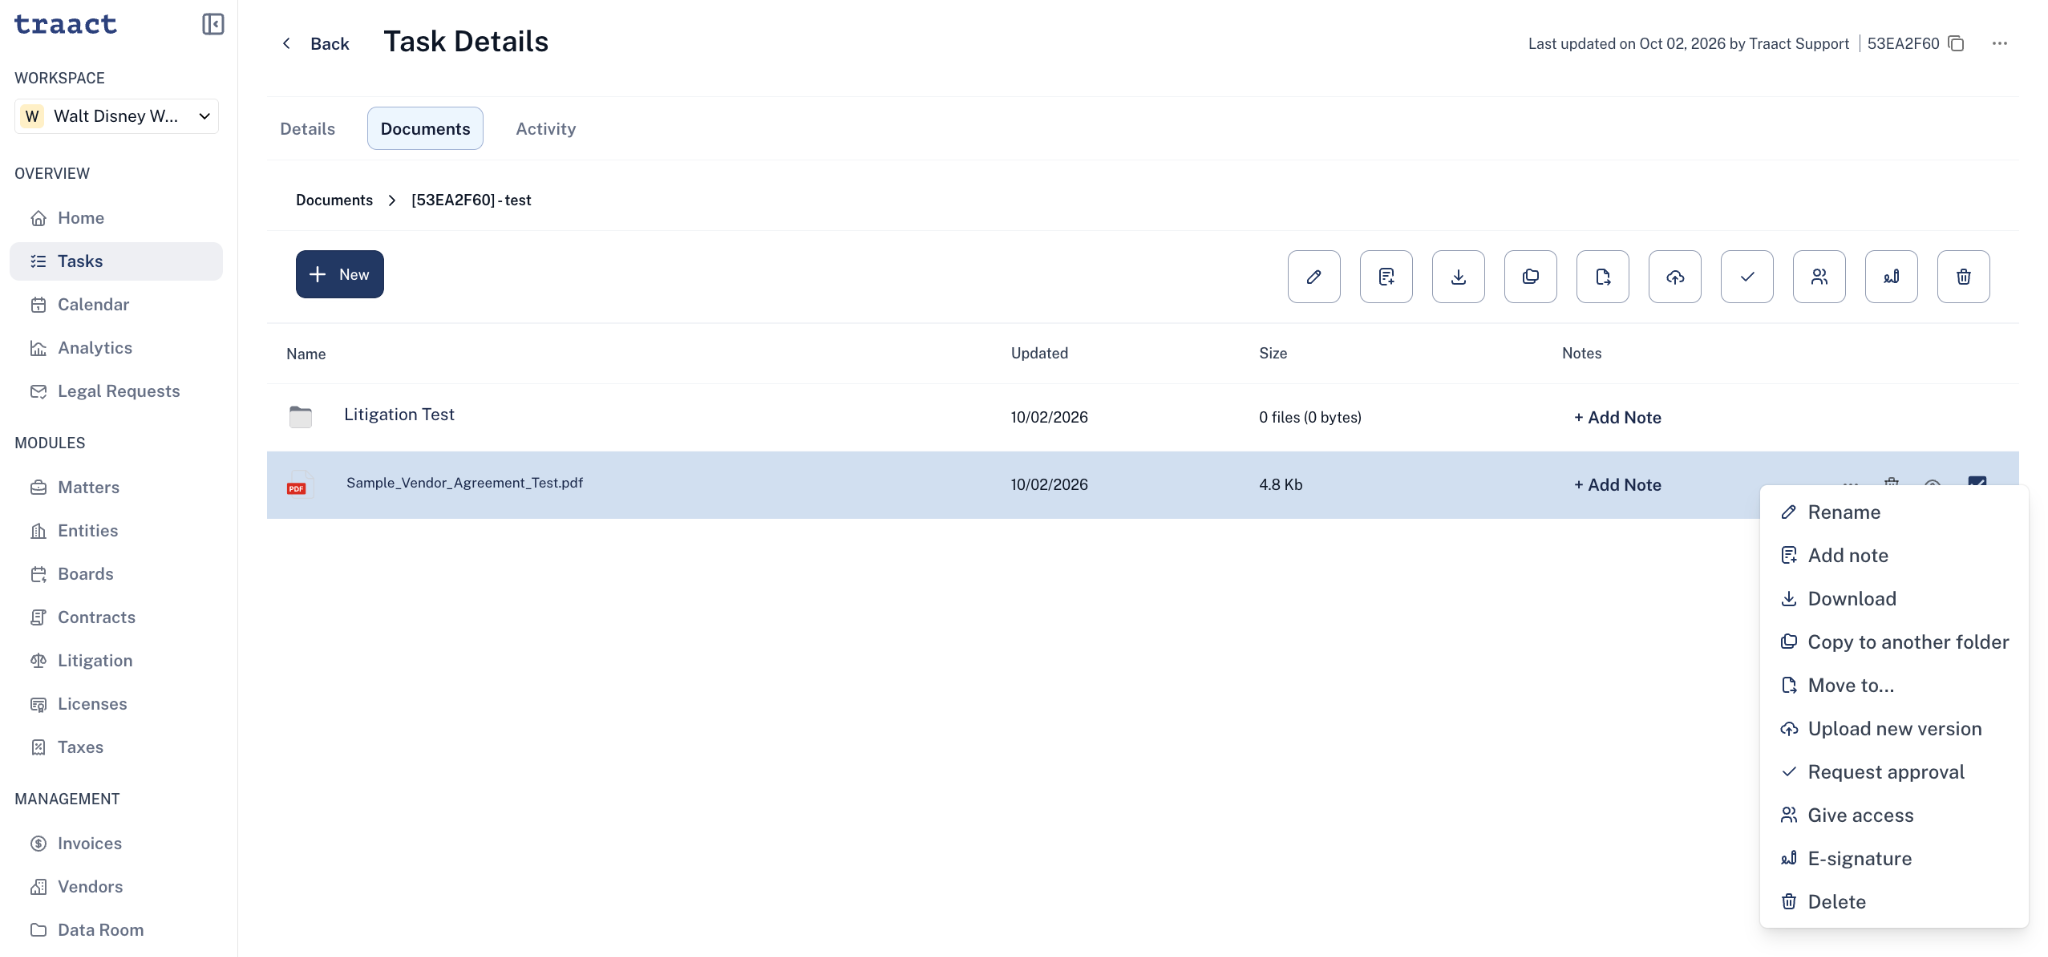
In your documents tab, you may create folders and shortcuts, upload files, and download your entire folder by clicking on "+ New”.
You can manage your items by selecting them with a single click, which will reveal menu icons. Hover over these icons for tooltips. Or, select the document and click on the three dots to access the desired actions in the menu.
How to Export Matters from My Workspace
On the main matters page, by clicking on the three dots shown in the image below, you can export your matter list in various formats, including Google Sheets, Excel, PDF, or CSV. You can also access your Archived Matters page from this menu.
Bulk Edit
Bulk edits also can be done to a matter by choosing the Matters that need to be edited and click on Bulk edit.
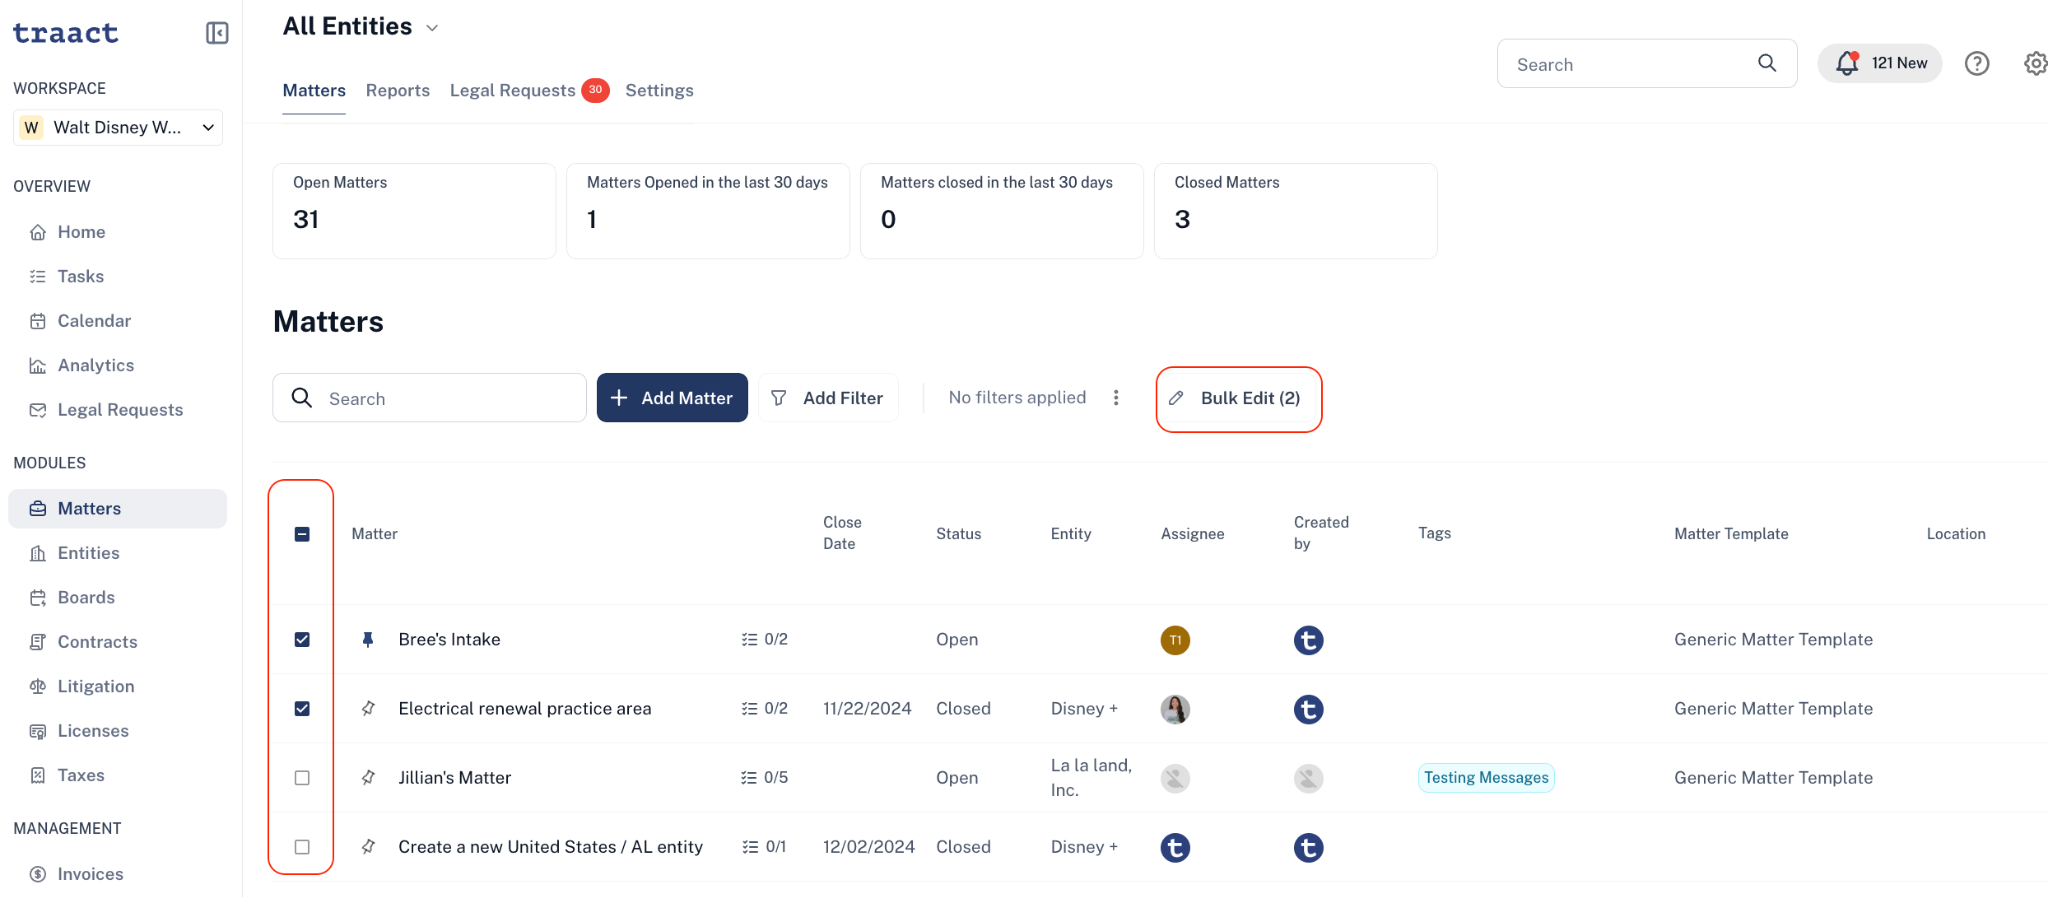
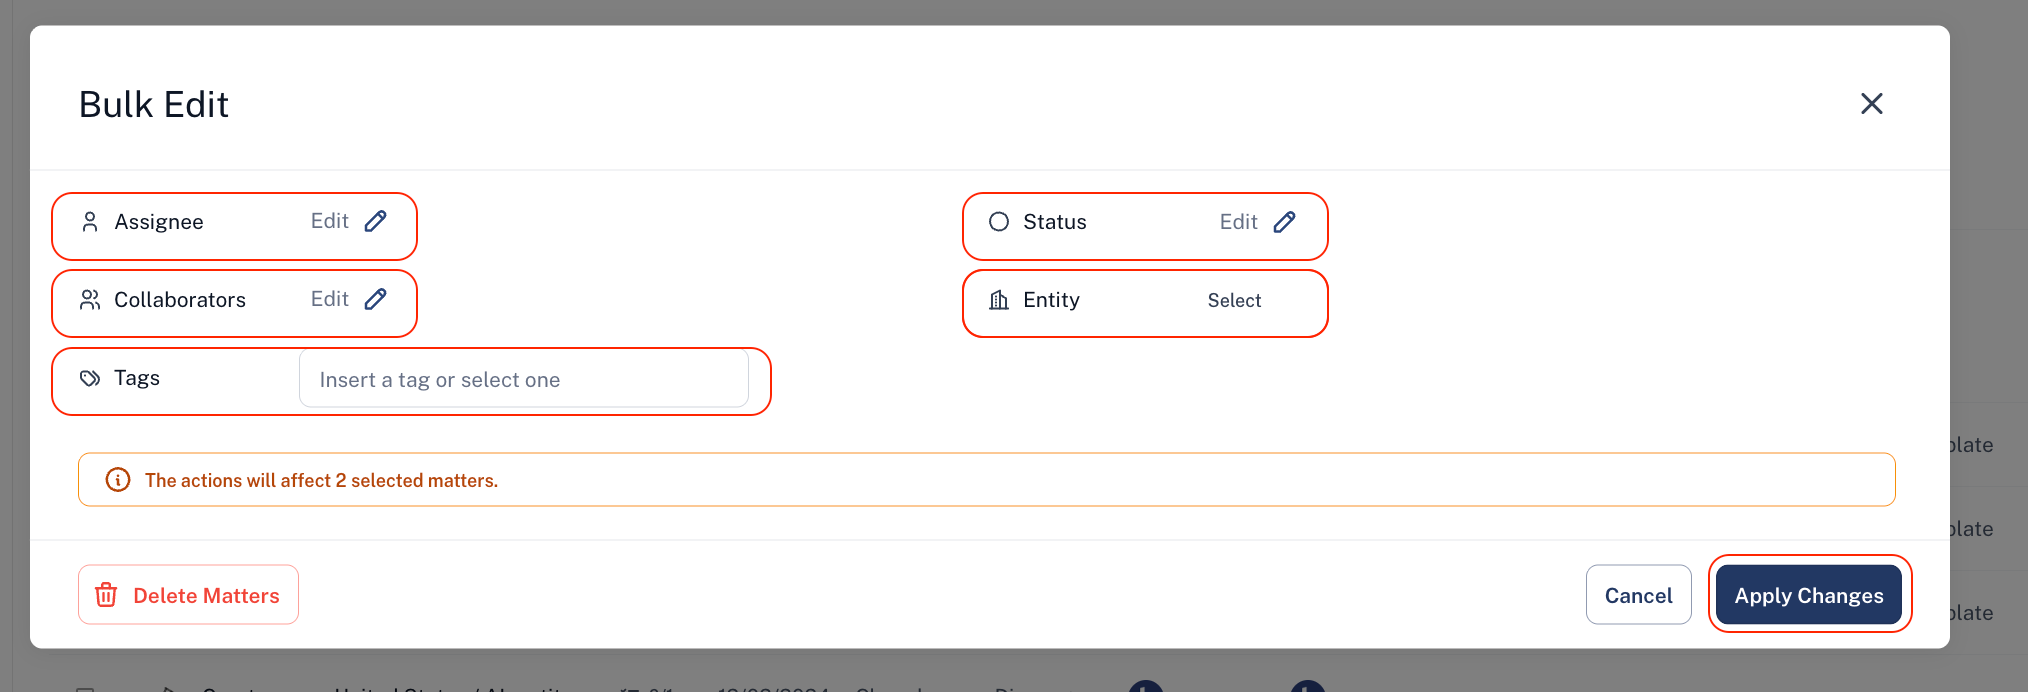
Bulk Edit – Pointers
- Assignee: Add or change the assigned user.
- Collaborators: Add or edit collaborators.
- Status: Update the matter status.
- Entity: Select the associated entity.
- Tags: Add or select tags.
- Apply Changes: Save changes for all selected matters.
Need Help?
If you have any questions or need assistance with a request, please contact your Customer Success Manager or reach out to the Traact Support team.